Getting crispy chicken wings in the oven isn’t about frying or complicated tricks. It’s about understanding how dry-brining and proper oven temps can work together to give you that perfect, crackly skin without all the mess. I’ve messed around with plenty of methods, and this one keeps it honest and straightforward.
There’s something satisfying about baking wings that are just as crispy as fried but way easier to pull off. No greasy splatters, no fuss, just good, honest oven tech that turns ordinary chicken into something snack-worthy. Plus, the smell of those edges crisping up makes the whole kitchen feel like a little celebration.
Focusing on the overlooked art of achieving perfectly crispy skin on baked chicken wings without frying, using a simple dry-brine and oven technique that turns out consistently crisp and juicy. This approach strips away the need for special equipment or coatings, emphasizing the beauty of straightforward, honest cooking.
The story behind this recipe
- I first started baking wings after a late-night craving that just wouldn’t quit. I wanted that crispy skin without the mess of frying, so I experimented with dry-brining and high heat in the oven. The moment I cracked that first batch, I knew I’d stumbled onto something worth sharing.
- There’s a particular joy in pulling a tray of bubbling, golden wings from the oven—knowing they’re crispy, juicy, and honest. It reminds me that good food doesn’t have to be complicated or greasy, just well thought out and executed with patience.
- heading: ‘The story behind this recipe’
Ingredient breakdown
- Chicken wings: I prefer fresh wings with skin on for the best crispness. If yours are frozen, thaw thoroughly to avoid soggy skin.
- Salt: I use kosher salt to dry-brine overnight, which boosts flavor and helps the skin crisp up. Don’t skip this step; it’s key.
- Baking powder: I rely on a bit of aluminum-free baking powder for extra crunch. Be sure to mix it well with the salt to evenly coat the wings.
- Paprika: Adds a smoky, vibrant hue and subtle flavor. If you’re out, smoked paprika can deepen that smoky aroma.
- Garlic powder: I like a generous sprinkle for a savory punch. Fresh garlic can work in the marinade, but keep it light to avoid burning during baking.
- Black pepper: Freshly cracked gives a sharp contrast to the rich skin. Adjust to your heat preference, but don’t skip it for flavor.
- Optional spices: Cayenne or chili powder can add a spicy kick. Use sparingly if you want just a hint, or go bold for heat.
Spotlight on key ingredients
Chicken wings:
- Fresh, skin-on wings are crucial for that crispy exterior. Frozen wings need thorough thawing to avoid sogginess. The skin should be dry for maximum crunch.
- Baking powder: I use a small amount of aluminum-free baking powder mixed with salt to dehydrate the skin, creating a crackly finish. Watch for clumping—mix well before coating.
Spices (paprika, garlic powder, cayenne):
- Salt: Kosher salt is perfect for dry-brining overnight. It enhances flavor and helps dry out the skin for crispness. Don’t skimp—patience is key.
- Paprika: Adds a smoky hue and subtle depth. Smoked paprika deepens aroma, while sweet paprika offers mild sweetness. Its vibrant color is as important as the flavor.
Notes for ingredient swaps
- Dairy-Free: Use coconut aminos or apple cider vinegar instead of soy sauce for a tangy twist, though it changes the umami depth.
- Gluten-Free: Swap all-purpose flour with rice flour or cornstarch for crispiness without gluten, but watch for slight texture differences.
- Low-Sodium: Reduce salt and baking powder slightly; add a touch more spices or herbs to compensate for flavor loss.
- Sweetener Swap: Honey or maple syrup can replace sugar in marinades for a sticky glaze, but they may caramelize faster.
- Spicy Alternative: Use gochujang or harissa instead of chili powder for a different heat profile and smoky depth.
- Herb Boost: Fresh thyme or rosemary can be added instead of dried spices for a bright, aromatic note.
- Oil Choice: Swap vegetable oil for duck fat or clarified butter for richer flavor, but be mindful of smoke points.
Equipment & Tools
- Baking sheet with wire rack: Ensures hot air circulates and wings crisp evenly.
- Paper towels: Pat wings dry for better crisping.
- Large mixing bowl: Toss wings with dry seasoning mixture.
- Tongs: Handle and turn wings safely during baking.
Step-by-step guide to baked wings
- Preheat your oven to 220°C (430°F). Line a baking sheet with foil and place a wire rack on top. This setup ensures hot air circulates around the wings for even crisping.
- Pat the chicken wings dry with paper towels. Remove excess moisture, especially from the skin, to help achieve that crispy finish.
- In a large bowl, combine 1 tablespoon kosher salt, 1 teaspoon baking powder, and any optional spices like smoked paprika or cayenne. Mix well.
- Sprinkle the dry mixture evenly over the wings, tossing thoroughly to coat all sides. The baking powder helps dehydrate the skin, creating crunch.
- Arrange the wings in a single layer on the wire rack, spacing them out. This prevents steaming and promotes crispness. Let them sit uncovered for 15 minutes to start drying out.
- Bake the wings in the preheated oven for 40-45 minutes. Flip them halfway through to ensure even browning. Look for golden edges and crackly skin.
- During baking, your kitchen will fill with a smoky, savory aroma. The wings should crackle when you shake the rack gently, indicating crispness.
- Remove from oven and let rest for 5 minutes. This allows juices to settle and the skin to firm up further. Serve immediately for maximum crunch.
Let the wings rest on the rack for 5 minutes. Serve hot, perhaps with a squeeze of lemon or your favorite dip. The skin remains crisp and juicy inside.
How to Know It’s Done
- Wings are golden and crackly, not pale or soggy.
- Internal temperature reaches 75°C (165°F).
- Skin feels firm and makes a crackling sound when shaken.
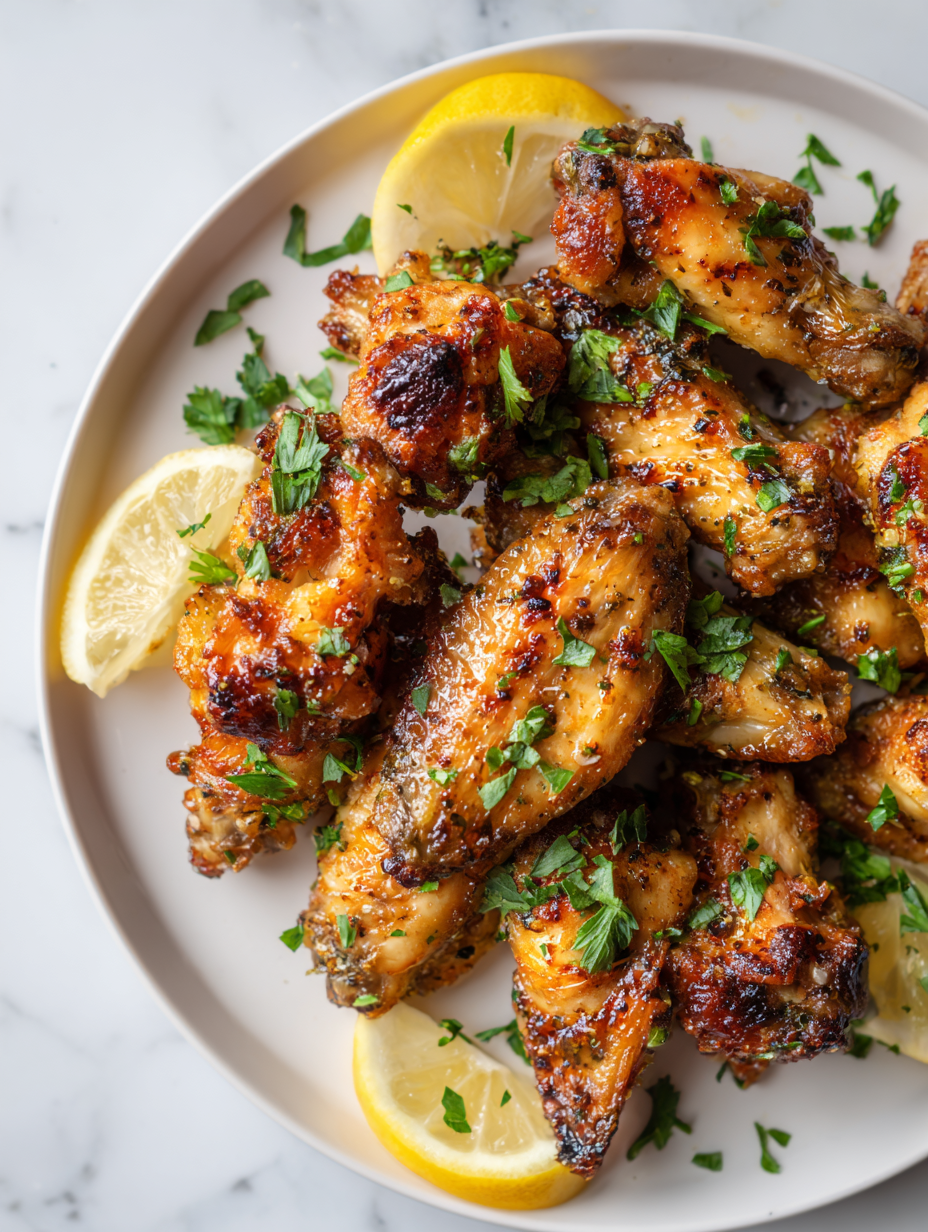
Crispy Oven-Baked Chicken Wings
Ingredients
Equipment
Method
- Preheat your oven to 220°C (430°F). Line a baking sheet with foil and set a wire rack on top—this allows hot air to circulate evenly around the wings for maximum crispness.
- Pat the chicken wings dry with paper towels—removing excess moisture is key to achieving a crispy skin. Feel the skin become slightly taut and dry to the touch.
- In a large bowl, combine kosher salt, baking powder, smoked paprika, garlic powder, and black pepper. Mix well to distribute the spices evenly.
- Sprinkle the spice mixture over the wings and toss thoroughly with tongs or your hands, ensuring each piece is evenly coated with the seasoned dry rub.
- Arrange the coated wings in a single layer on the wire rack, leaving space between each to allow air circulation. Let them sit uncovered for about 15 minutes to start drying out further.
- Bake the wings in the preheated oven for 40 to 45 minutes. Flip them halfway through using tongs, aiming for an even, golden brown color and crackly skin.
- Listen for a gentle crackling sound and check for a deep golden hue. The skin should feel firm and crispy when you gently shake the tray.
- Remove the wings from the oven and let them rest on the rack for 5 minutes. This allows juices to settle and keeps the skin crisp when serving.
- Serve the wings hot, with your favorite dips or a squeeze of lemon. Enjoy that satisfying crunch and juicy interior in every bite.
Pro tips for crispy baked wings
- Use a wire rack to elevate wings—air circulation is your best friend for crisp skin.
- Pat wings dry thoroughly—moisture is the enemy of crunch, so take your time with towels.
- Toss wings in baking powder and salt mixture evenly—clumping ruins the coating, so mix well.
- Flip wings halfway—ensure even browning and crispy edges, watch for those golden tips.
- Bake at high heat (220°C/430°F)—the intense heat dehydrates skin quickly, creating that crackly texture.
- Rest wings for 5 minutes after baking—allows juices to settle and skin to stay crisp when served.
- Listen for crackling—if wings crackle when shaken, they’re perfectly crispy and ready to eat.
Common mistakes and how to fix them
- FORGOT to pat wings dry → Drying ensures maximum crispness.
- DUMPED baking powder directly → Mix it thoroughly with salt for even coating.
- OVER-TORCHED wings → Reduce oven temperature slightly or check early.
- SKIPPED resting time → Rest wings 5 minutes for juices to settle and skin to firm.
Fast fixes for crispy perfection
- When wings aren’t crispy enough → Splash with a bit more baking powder and bake a few extra minutes.
- If wings are soggy → Patch with quick broil at high heat for 2 minutes until crackling.
- DUMPED seasoning unevenly → Shake wings in a sealed bag with seasoning for even coating.
- Overcooked wings → Reduce oven temperature slightly and check at 35-minute mark to prevent burning.
- If skin sticks to rack → Spray rack lightly with oil before baking for easy release.
Prep, store, and reheat tips
- Prep the wings by drying and seasoning them a day ahead; store uncovered in the fridge to keep the skin dry and ready for crisping.
- Keep cooked wings in an airtight container in the fridge for up to 3 days. Reheat in a 180°C (350°F) oven until crispy and hot, about 10 minutes, checking for crackle and even heat.
- Frozen cooked wings can last up to a month. Thaw in the fridge overnight, then reheat for crispness—expect a slight loss in initial crunch.
- Reheating tips: For best texture, broil wings for 2–3 minutes, watching carefully for burning. The smell should revive with that savory, smoky aroma, and skin should crackle again.
- Flavors may mellow overnight, so consider adding a splash of fresh lemon or a sprinkle of herbs after reheating to brighten the taste.
Top questions about baked chicken wings
1. How do I get crispy skin on baked wings?
Pat the wings thoroughly dry with paper towels before seasoning. Moisture prevents crisping and leads to soggy skin.
2. What’s the secret to extra crispy wings in the oven?
Use a mixture of salt and baking powder, tossed evenly over the wings. This combo dehydrates the skin and creates crunch.
3. What oven temperature is best for crispy baked wings?
Bake at a high temperature, around 220°C (430°F), and flip the wings halfway. This ensures even browning and crackly skin.
4. Should I let baked wings rest before eating?
Allow the wings to rest for 5 minutes after baking. This helps juices settle and keeps the skin crisp when you serve.
5. Why use a wire rack when baking wings?
Line your baking sheet with foil and place a wire rack on top. It promotes air circulation and even crisping.
6. How do I know when baked wings are done?
Check for a golden color, crackling sound when shaken gently, and an internal temp of 75°C (165°F). These confirm doneness.
7. Can I make baked wings ahead of time?
Store leftovers uncovered in the fridge for up to 3 days. Reheat in a hot oven until crispy and sizzling, about 10 minutes.
8. What if my wings aren’t crispy after baking?
If wings aren’t crispy enough, broil them for 2-3 minutes, watching carefully, until the skin crackles again.
9. How do I prevent wings from sticking to the rack?
Spray the wire rack lightly with oil before baking to prevent sticking and help with easy cleanup.
10. Can I use frozen wings for this recipe?
Use fresh, skin-on chicken wings for the best crispness. Frozen wings need thorough thawing to avoid soggy skin.
There’s something about crisp, oven-baked wings that makes casual dinners feel a little more special. The smell of smoky, crispy skin filling the kitchen always brings a quiet sense of achievement, even on busy nights. It’s honest, straightforward comfort food that’s perfect for sharing or just enjoying solo.
In a world full of complicated recipes, this one reminds me that good food doesn’t need to be fiddly or greasy. Sometimes, all it takes is a little patience and the right heat to turn simple ingredients into something genuinely satisfying. That’s what makes these wings worth coming back to, again and again.

