
Baked chicken tenders are my go-to when I want something crispy without the fuss of frying. There’s a quiet satisfaction in watching them turn golden in the oven, especially when I can toss in a spice blend that makes them smell like a smoky summer grill, even in the dead of winter. It’s a simple, honest recipe, but the flavors feel like a little secret I keep in my back pocket.
What I love about this recipe is how forgiving it is—perfect for busy weeknights or when I have friends dropping by unexpectedly. The tenders stay juicy inside, with just enough crunch outside to satisfy that craving for texture. Plus, it’s a healthier choice that doesn’t skimp on flavor, so I feel good about serving them up to anyone.
In the end, it’s about comfort and ease—something you can count on, especially when the kitchen’s a little chaotic. These tenders remind me that good food doesn’t have to be complicated, just honest and made with a little love—and maybe a sprinkle of that smoky spice.
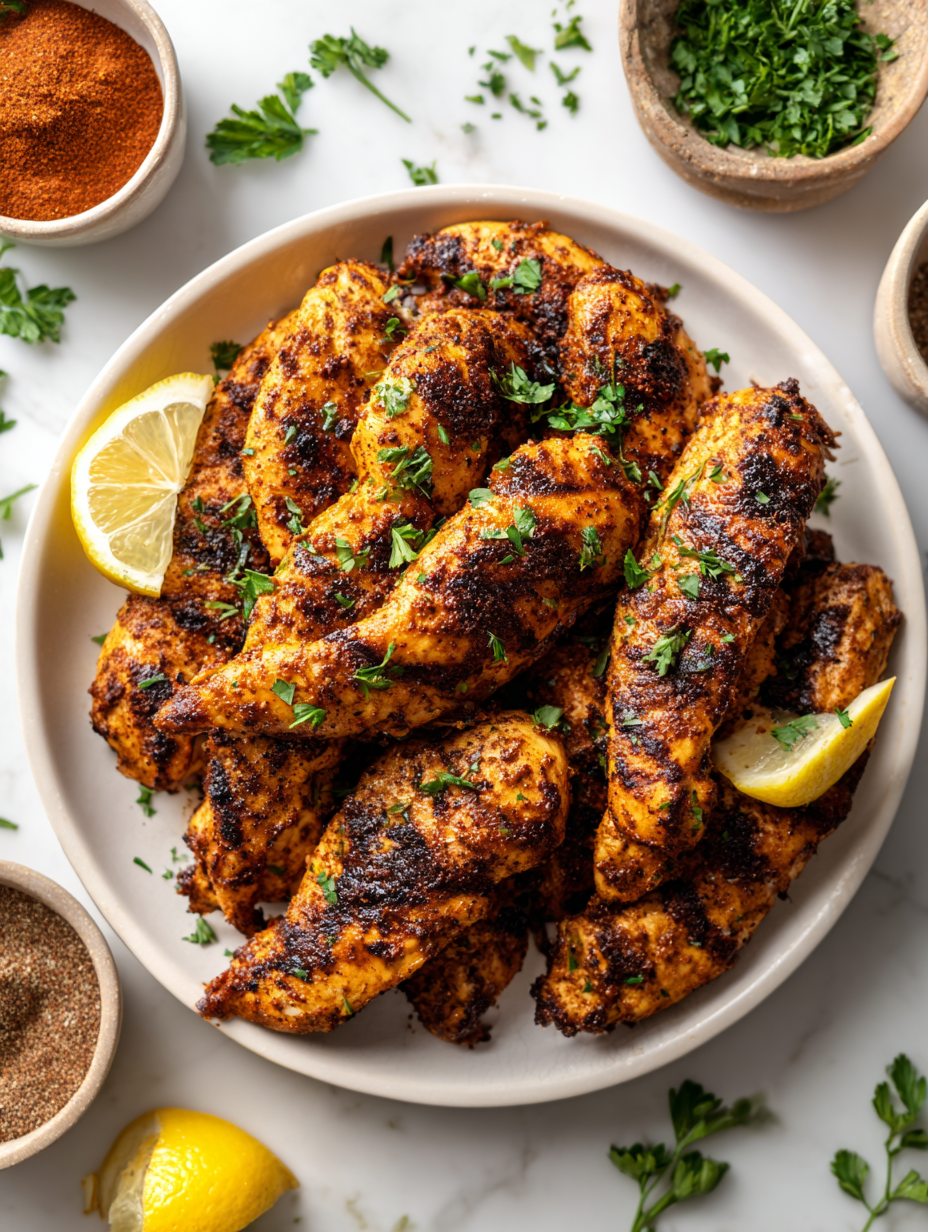
This recipe focuses on creating baked chicken tenders that are irresistibly crispy on the outside but tender and juicy inside, using a simple baking method that avoids the mess and oil of frying. The twist is a unique spice blend that adds a smoky, slightly sweet depth, reminiscent of summer barbecue flavors, but achieved with pantry staples and a hot oven.
The story behind this recipe
- This recipe came together after I realized how often I crave something crispy and satisfying, but didn’t want the mess or oil of frying. I wanted that crunch, but with less fuss and fewer leftovers to deal with. One day, I just threw some chicken tenders in the oven with a spice blend I loved, and they turned out better than expected—crisp outside, tender inside, with a smoky kick that made me smile.
- It’s a dish I make when I need comfort but also want to keep things simple. It reminds me of summer barbecues, even when it’s snowing outside, because of that smoky, slightly sweet aroma wafting from the oven. Plus, it’s so forgiving—overcooked a bit? No worries, still juicy. It’s become my quick fix for busy nights or when I want something cozy and straightforward.
- heading:
Key ingredients and tips
- Chicken breasts: I prefer skinless, boneless breasts—they stay juicy and cook evenly. If yours are thick, pound them to even thickness for uniform crispiness.
- Breadcrumbs: I use panko for extra crunch, but regular fine breadcrumbs work too. Toast them lightly if you want a nuttier flavor and crunch.
- Spice blend: I mix smoked paprika, garlic powder, and a pinch of cayenne—smoky and just a hint spicy. Adjust the cayenne if you like more heat.
- Egg wash: Beaten eggs help the coating stick. For a richer flavor, add a splash of milk or hot sauce for a tangy kick.
- Oil spray: A quick spray of oil before baking helps the tenders turn golden and crispy. Don’t skip this step, or they might look pale and dry.
- Optional herbs: Fresh parsley or thyme stirred into the breadcrumb mix adds a burst of freshness. Use sparingly if you want a subtle herbaceous note.
- Lemon: A squeeze of lemon after baking brightens the flavor and cuts through the richness—don’t skip this for a lively finish.
Spotlight on key ingredients
Chicken breasts:
- I prefer skinless, boneless breasts—they stay juicy and cook evenly. If yours are thick, pound them to even thickness for uniform crispiness.
- Breadcrumbs: I use panko for extra crunch, but regular fine breadcrumbs work too. Toast them lightly if you want a nuttier flavor and crunch.
Spice blend and lemon:
- Spice blend: I mix smoked paprika, garlic powder, and a pinch of cayenne—smoky and just a hint spicy. Adjust the cayenne if you like more heat.
- Lemon: A squeeze of lemon after baking brightens the flavor and cuts through the richness—don’t skip this for a lively finish.
Notes for ingredient swaps
- Dairy-Free: Use almond or coconut milk instead of eggs for the wash; it might not be as sticky but still helps coating.
- Gluten-Free: Swap panko for crushed gluten-free cereal or almond meal; expect a slightly denser crunch.
- Low-Sodium: Choose unsalted breadcrumbs and skip added salt; season more aggressively with spices if desired.
- Spicy Kick: Add more cayenne or hot sauce to the egg wash for extra heat—be mindful of balance with other flavors.
- Herb Variations: Use dried thyme or Italian seasoning instead of fresh herbs for a different aromatic profile.
- Breadcrumbs: Toast regular breadcrumbs lightly in a dry skillet before coating for a deeper, nuttier flavor.
- Lemon: Substitute lime or vinegar for brightness if lemon isn’t available; it adds a different kind of tang.
Equipment & Tools
- Baking sheet with wire rack: Supports even baking and crisping without sitting in oil.
- Shallow dishes and bowls: Organize flour, egg wash, and breadcrumbs for easy coating.
- Oven: Provides consistent heat for even cooking.
- Tongs: Handle chicken strips without disturbing the coating.
- Cooking thermometer: Check internal doneness for safety and juiciness.
Step-by-step guide to baking tenders
- Preheat your oven to 200°C (400°F). Line a baking sheet with parchment paper or a silicone mat for easy cleanup.
- Prepare your equipment: a shallow dish for the flour, a bowl for the egg wash, and a plate for the breadcrumbs. A wire rack placed on the baking sheet helps crisp the tenders evenly.
- Slice chicken breasts into uniform strips, about 1 inch wide. Pat them dry with paper towels to ensure the coating sticks.
- Set up your coating stations: first dredge each strip in flour, shaking off excess; then dip into the beaten egg, letting excess drip off; finally, coat thoroughly in seasoned panko breadcrumbs, pressing gently to adhere.
- Arrange the coated tenders on the wire rack, leaving space between each. Spray lightly with oil for extra crunch and golden color.
- Bake in the preheated oven for 20-25 minutes. Halfway through, flip the tenders and spray again with oil. They should turn a golden brown and sound crackly when tapped.
- Check doneness: the internal temperature should reach 75°C (165°F). The coating should be crispy, and tenders should jiggle slightly but not be raw inside.
- Remove from oven and let rest for 5 minutes. Sprinkle with a little sea salt or herbs if desired. Serve hot with your favorite dipping sauces.
Let the tenders rest on the rack for 5 minutes to settle. Serve immediately with a squeeze of lemon or your favorite sauce for added brightness.
How to Know It’s Done
- Golden, crispy exterior with even color.
- Internal temperature hits 75°C (165°F).
- Tenders feel firm but yield slightly when pressed.
Baked Smoky Chicken Tenders
Ingredients
Equipment
Method
- Preheat your oven to 200°C (400°F) and line a baking sheet with parchment paper or a silicone mat. Place a wire rack on top to allow air circulation.
- Slice the chicken breasts into uniform strips about 1 inch wide. Pat them dry with paper towels to help the coating stick.
- Set up three shallow dishes: one with beaten eggs, one with seasoned panko breadcrumbs mixed with smoked paprika, garlic powder, cayenne, salt, and pepper, and one for flour if needed (optional).
- Dredge each chicken strip in the flour (if using), then dip into the beaten eggs, letting the excess drip off.
- Press each egg-coated strip into the seasoned panko breadcrumbs, ensuring an even coat. Gently press the breadcrumbs onto the surface for good adhesion.
- Arrange the coated tenders on the wire rack, spacing them evenly. Spray lightly with oil to promote crisping.
- Bake in the preheated oven for 20-25 minutes, flipping the tenders halfway through and spraying again with oil to ensure an even golden color. You’ll hear a gentle crackle and see a deep golden hue develop.
- Check the internal temperature with a thermometer; it should reach 75°C (165°F), and the coating should be crispy and golden brown.
- Remove the tenders from the oven and let them rest for about 5 minutes. Squeeze fresh lemon over the tenders for a bright, tangy finish.
- Serve the tenders hot with your favorite dipping sauces or a side salad. The exterior should be irresistibly crispy, with juicy, tender meat inside.
Notes
Pro tips for perfect tenders
- Bolded mini-head: Use panko breadcrumbs for maximum crunch—press them gently onto the chicken for better adhesion.
- Bolded mini-head: Spray oil evenly before baking—this helps achieve a golden, crispy exterior without excess grease.
- Bolded mini-head: Watch the color—tenders should turn a deep golden brown, signaling they’re crispy and cooked through.
- Bolded mini-head: Flip halfway through—this ensures even browning on all sides and a consistent crunch.
- Bolded mini-head: Check internal temp—aim for 75°C (165°F) to guarantee juicy, safe chicken inside.
- Bolded mini-head: Rest briefly after baking—let tenders sit for 5 minutes; this keeps them juicy and enhances texture.
- Bolded mini-head: Serve immediately—crispiest when fresh out of the oven, with sauces or lemon for brightness.
Common mistakes and how to fix them
- FORGOT to preheat the oven → Always start with a hot oven to ensure crispy tenders.
- DUMPED the coating unevenly → Gently press breadcrumbs onto chicken for better adhesion.
- OVER-TORCHED the tenders → Reduce oven temperature or bake a few extra minutes for even crispness.
- USED cold oil spray → Use room temperature spray for even coating and browning.
Quick fixes and pantry swaps
- When chicken looks pale, splash a little more oil for extra crispness.
- If coating is uneven, patch thin spots with extra breadcrumb mixture.
- Dumped the tenders in a too-crowded pan? Shield with foil and roast for even cooking.
- Over-torched the edges? Rescue by lowering oven temp and covering with foil.
- When tenders are dry, soak briefly in warm broth before serving for moisture.
Prep, store, and reheat tips
- Prep the tenders by coating and seasoning them a day in advance; keep refrigerated to let flavors meld and save time during cooking.
- Store cooked chicken tenders in an airtight container in the fridge for up to 3 days; they stay juicy but may lose some crispness, so reheat carefully.
- For longer storage, freeze tenders in a single layer on a baking sheet, then transfer to a zip-top bag for up to 2 months. Thaw overnight in the fridge for best results.
- Reheat in a hot oven (about 180°C/350°F) for 10-15 minutes until heated through and crispy again—listen for that satisfying crunch and smell that hints at fresh-baked.
Top questions about baked chicken tenders
1. Can I use chicken thighs instead?
Use chicken breasts for the juiciest, most tender tenders. Thinner strips cook more evenly and stay moist.
2. Can I bake these at a lower temperature?
Yes, but thighs may be juicier and take a minute longer to cook. Adjust timing accordingly.
3. How hot should the oven be?
Preheat your oven to 200°C (400°F) to get that crispy exterior and tender inside. Skipping preheat can lead to uneven crisping.
4. How do I know when they’re done?
Bake until golden brown and an internal temp of 75°C (165°F). The coating should be crispy and chicken firm but juicy.
5. My tenders aren’t crispy enough. What can I do?
If the tenders aren’t crispy enough, give them a quick broil for 1-2 minutes, but watch closely so they don’t burn.
6. Can I add flavor after baking?
Add a splash of hot sauce or lemon juice after baking for an extra flavor boost and brightness.
7. What kind of breadcrumbs work best?
Use panko breadcrumbs for extra crunch. Toast them lightly before coating for a nuttier, more robust texture.
8. Can I prepare these in advance?
Yes, you can prepare the coated tenders a day ahead, refrigerate, then bake when ready. They stay juicy but may be a bit less crispy.
9. How should I reheat leftovers?
Reheat in a 180°C (350°F) oven for 10-15 minutes until hot and crispy. Avoid microwave, which makes them soggy.
10. The coating isn’t sticking well. What do I do?
If the coating falls off, press breadcrumbs firmly onto the chicken before baking and spray lightly with oil for better adhesion.
These baked chicken tenders are my fallback when I need something quick, satisfying, and not oily. The crispy outside with that smoky spice blend makes them feel special, even on a weekday. They remind me that good, honest comfort food can be straightforward and still memorable.
Sharing these with friends or family always feels like a little celebration—something about that aroma and crunch sparks a smile. Plus, knowing I can make them ahead or reheat them without losing too much texture keeps this recipe in my regular rotation. It’s simple, honest, and just right for those busy, craving-filled days.

