
Sweet potatoes are naturally sweet, but when baked to caramelization, they develop a smoky, complex depth that makes them stand out. I’ve always loved how just a bit of high heat transforms their flavor into something richer and more intriguing, almost like a sweet-salty dance on your tongue.
This recipe isn’t just about crispy edges — it’s about embracing that slow caramelization process. It takes patience, a hot oven, and a little bit of patience, but the payoff is fries that taste like they’ve been roasted over an open flame, minus the fuss. It’s one of those small culinary miracles that makes everyday snacks feel special.
Baking these sweet potato fries is my go-to for a snack that feels both comforting and a little bit indulgent. The smell of caramelizing sugars filling the kitchen is a reminder that simple ingredients, treated right, can give you a whole new appreciation for humble sweet potatoes. Plus, no oil splatters, just pure oven magic.
Focusing on how the caramelization process enhances natural sweetness and adds a smoky depth that transforms simple sweet potato fries into a truly flavorful snack.
The inspiration behind the fries
- I first started making these baked sweet potato fries after a late-night craving for something sweet and salty. The caramelization that happens in the oven transforms the humble sweet potato into something almost smoky and deeply flavorful. It’s as if they bloom into a new dish entirely, with minimal effort but maximum impact.
- One evening, I was experimenting with roasting them at a higher temperature and discovered how the edges got that perfect, crisp char while the insides stayed tender and oozy. Since then, I’ve been hooked on the process of coaxing out that natural sweetness and smoky aroma, all without frying or extra oil. It’s a simple pleasure that feels a little rebellious against the usual snack routine.
- heading: ‘The story behind this recipe’
Ingredient breakdown: key components
- Sweet potatoes: I look for firm, smooth ones with deep orange color. Skip the soft or sprouted ones—they won’t crisp up right.
- Olive oil: A light drizzle helps with crisping and adds a subtle fruity note. Too much, and they’ll be greasy—just a teaspoon per batch.
- Salt: I prefer flaky sea salt for that instant crunch and burst of briny flavor. Adjust to taste, especially if your sweet potatoes are especially sweet.
- Paprika: A pinch for smoky warmth—use smoked paprika if you want an extra depth, but be careful not to overpower the natural sweetness.
- Black pepper: Freshly cracked brings a spicy kick. Add more if you like a hint of heat, but don’t drown the fries in it.
- Optional spices: Cayenne, cinnamon, or a touch of cumin can add a surprising twist. Use sparingly—these are sweet potato fries, not a spice bomb.
Spotlight on key ingredients
Sweet potatoes:
- I look for firm, smooth ones with deep orange color. Skip the soft or sprouted ones—they won’t crisp up right.
- Olive oil: A light drizzle helps with crisping and adds a subtle fruity note. Too much, and they’ll be greasy—just a teaspoon per batch.
- Salt: I prefer flaky sea salt for that instant crunch and burst of briny flavor. Adjust to taste, especially if your sweet potatoes are especially sweet.
Paprika & Black Pepper:
- Paprika: A pinch for smoky warmth—use smoked paprika if you want an extra depth, but be careful not to overpower the natural sweetness.
- Black pepper: Freshly cracked brings a spicy kick. Add more if you like a hint of heat, but don’t drown the fries in it.
Notes for ingredient swaps
- Sweet potatoes: I prefer firm, deep orange ones. If yours are soft or sprouted, they won’t crisp up well—look for those with smooth skin and a dense texture.
- Olive oil: Use a light drizzle of any neutral oil like avocado or grapeseed. Too much oil makes them greasy; just enough to coat.
- Salt: Flaky sea salt adds crunch and bursts of briny flavor. If you only have regular table salt, reduce slightly to avoid over-salting.
- Paprika: Smoked paprika gives a smoky depth. Regular paprika works if you want a milder, sweeter flavor—skip the smoky variety if you dislike it.
- Black pepper: Freshly cracked is best for a spicy kick. If you prefer milder heat, use less or substitute with white pepper.
- Optional spices: Cayenne for heat, cinnamon for warmth, or cumin for earthiness—add sparingly, tasting as you go to keep the natural sweetness front and center.
- Herbs: Fresh thyme or rosemary can be tossed in for herbal aroma—use sparingly, as they can overpower the caramelized sweetness.
Equipment & Tools
- Baking sheet: To hold and evenly bake the fries in a single layer.
- Parchment paper: To prevent sticking and make cleanup easier.
- Large mixing bowl: To toss the fries with oil and spices evenly.
- Spatula: To flip the fries midway for even browning.
- Knife and cutting board: To cut the sweet potatoes into uniform sticks.
Step-by-step guide to baked sweet potato fries
- Preheat your oven to 220°C (430°F). Line a baking sheet with parchment paper for easy cleanup.
- Choose firm, smooth sweet potatoes. Peel them if you prefer, then slice into even sticks about 1/4 inch thick. Uniform size ensures even baking.
- In a large bowl, toss the sweet potato sticks with 1 teaspoon of olive oil, just enough to lightly coat. Add a pinch of flaky sea salt and a sprinkle of smoked paprika for smoky depth.
- Spread the fries in a single layer on the prepared baking sheet. Make sure they aren’t crowded—air needs to circulate for crispiness.
- Bake for 20 minutes. After 10 minutes, use a spatula to flip the fries so they brown evenly. Keep an eye on them—they can go from perfect to burnt quickly.
- Check the fries at 20 minutes: edges should be caramelized and crispy, with a deep amber color. The smell will be sweet and smoky, inviting and rich.
- If they’re not quite there, bake for an additional 3-5 minutes, watching carefully to prevent over-browning. The fries should crackle slightly when you shake the sheet.
- Remove from oven and let rest for 2 minutes. They will continue to crisp slightly as they cool. Serve immediately or transfer to a wire rack for even cooling.
- For finishing, sprinkle with a bit more flaky salt if needed. Plate and enjoy while warm, with a smoky aroma lingering in the air.
Let the fries sit for 2 minutes after baking to crisp up further. Lightly sprinkle with flaky sea salt before serving. Plate in a warm dish, and serve immediately to enjoy the full smoky flavor and crispy texture.
How to Know It’s Done
- Edges are deeply caramelized and slightly charred, with a smoky aroma.
- Fries are crispy on the outside and tender inside when gently pressed or bitten.
- Color is a rich, deep amber all over, not pale or soggy.
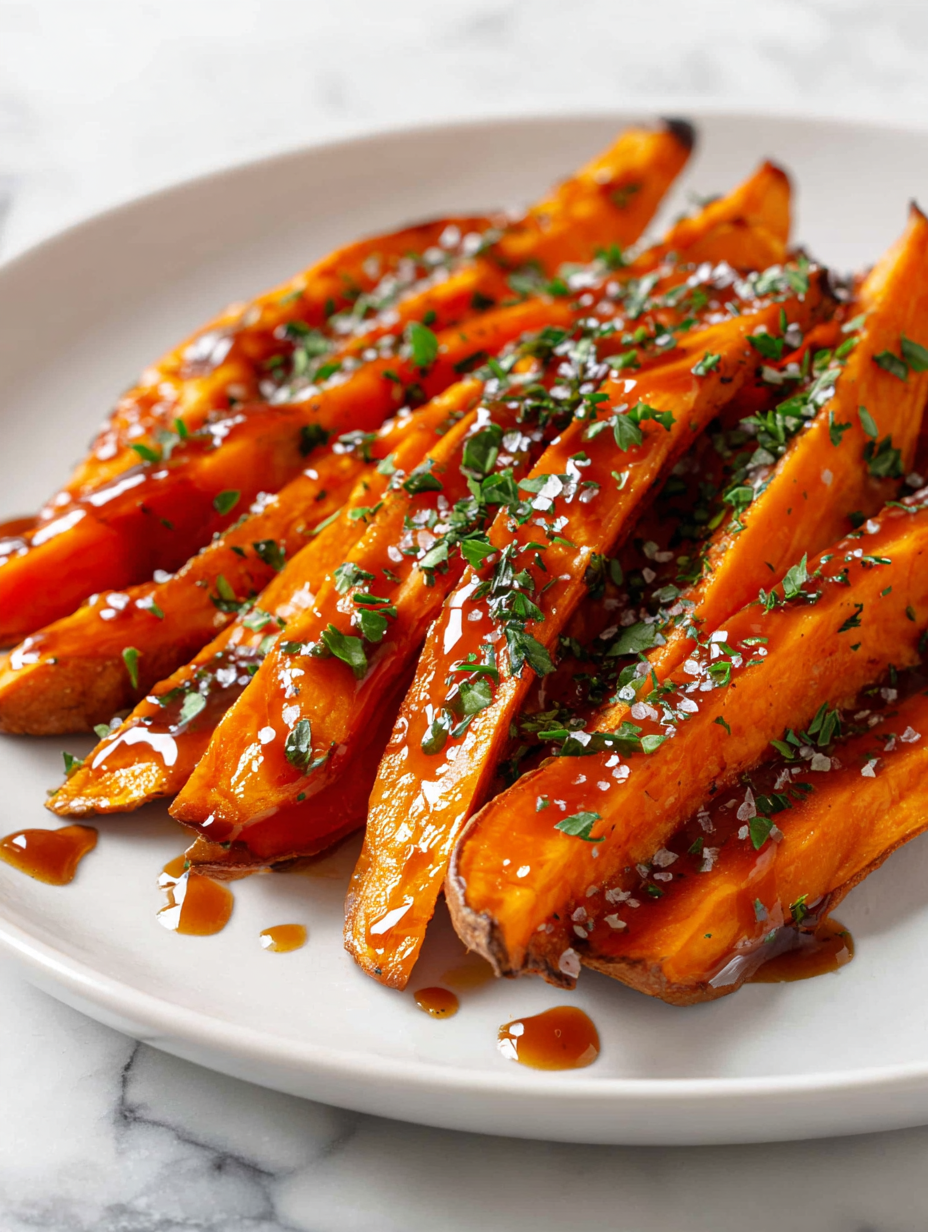
Caramelized Baked Sweet Potato Fries
Ingredients
Equipment
Method
- Preheat your oven to 220°C (430°F) and line a baking sheet with parchment paper.
- Peel the sweet potatoes if desired, then slice them into even sticks about 1/4 inch thick. Aim for uniform pieces for even baking and caramelization.
- Place the sliced sweet potatoes into a large mixing bowl. Drizzle with a teaspoon of olive oil and toss gently to coat all the pieces evenly. This helps with crisping and enhances flavor.
- Add a pinch of flaky sea salt and a quarter teaspoon of smoked paprika to the bowl. Toss again to distribute the spices evenly over all the fries.
- Spread the fries out in a single layer on the prepared baking sheet. Make sure they aren’t crowded—airflow is key for even caramelization and crisp edges.
- Bake in the preheated oven for about 20 minutes. After 10 minutes, flip the fries using a spatula to ensure they brown evenly and develop those beautiful caramelized edges.
- Check the fries at the 20-minute mark: they should be deeply golden with crispy, slightly charred edges and a rich, smoky aroma. If needed, bake for an additional 3-5 minutes, watching carefully to prevent burning.
- Remove the fries from the oven and let them rest for 2 minutes. During this time, they will crisp up further and the flavors will deepen.
- Sprinkle a little more flaky sea salt over the fries for an extra burst of flavor. Serve immediately while hot, allowing the smoky, caramelized aroma to fill the air.
Tips & Tricks for Perfect Fries
- Heat: Use high oven temperature to encourage deep caramelization and smoky edges.
- Uniformity: Cut sweet potatoes into even sticks to ensure consistent crispness and color.
- Flipping: Turn fries halfway through baking for even browning and crackling edges.
- Observation: Watch for deep amber color and smell of roasted sugars as signs of readiness.
- Minimal Oil: Use just enough oil to coat—the less, the crispier the fry, less greasy.
- Resting: Let fries sit for 2 minutes post-baking; they’ll crisp up as they cool slightly.
- Season Last: Add extra flaky salt right after coming out of the oven for maximum crunch and flavor.
Common mistakes and how to fix them
- USED TOO MUCH OIL: Keep oil light to avoid greasy fries—just a teaspoon per batch.
- DIDN’T PRE-HEAT OVEN: Always preheat to 220°C (430°F) for even caramelization.
- FAILED TO FLIP FRIES: Turn halfway through baking to prevent uneven browning.
- OVERCOOKED: Watch closely after 20 minutes; edges should be caramelized, not burnt.
Quick Fixes for Perfect Fries
- When fries look pale, splash a little more oil and bake a few extra minutes.
- If fries are soggy, increase oven temperature slightly and spread them out more.
- Dumped too much oil? Pat fries with paper towels and bake a minute longer to crisp.
- Over-torched edges? Shield with foil and lower oven temp for the next batch.
- When fries stick or clump, try a pantry swap—use cornstarch for extra crispness.
Prep, store, and reheat tips
- You can prep the sweet potato sticks a day ahead; keep them in an airtight container in the fridge to prevent drying out, and they’ll stay fresh for up to 24 hours.
- Store baked fries in a single layer in an airtight container in the fridge for up to 2 days. Reheat in a hot oven to revive crispiness—expect a few minutes of crackling and aroma of caramelized sugars.
- For longer storage, freeze the fries spread out on a baking sheet, then transfer to a freezer bag. They keep well for up to 3 months but may lose some crunch upon reheating.
- Reheat directly from fridge or freezer in a 220°C (430°F) oven for 5–10 minutes. Look for that shimmer of oil and listen for a crackle to ensure they’re crispy again.
- Note: reheated fries won’t be quite as crisp as fresh, but a quick blast in the oven will bring back that smoky aroma and slightly caramelized flavor.
Top questions about baked sweet potato fries
1. How do I choose the best sweet potatoes?
Look for firm, smooth sweet potatoes with deep orange flesh. Soft or sprouted ones won’t crisp well.
2. How much oil do I really need?
Use a light coating of olive oil—just enough to help with crisping, about a teaspoon per batch.
3. Should I salt before or after baking?
Flaky sea salt adds a satisfying crunch and burst of briny flavor; sprinkle after baking for best effect.
4. What oven temperature is ideal?
Bake at 220°C (430°F) for about 20 minutes, flipping halfway through for even caramelization.
5. How do I know when the fries are done?
Look for deep amber color, crispy edges, and a smoky caramel smell to tell when they’re ready.
6. Can I use different spices?
For a smoky flavor, smoked paprika works best. Regular paprika adds a milder, sweet touch.
7. Can I make these in advance?
You can prep cut sweet potatoes a day ahead, keep them in the fridge, and bake when ready.
8. How do I reheat leftovers?
Reheat in a hot oven (220°C/430°F) for 5–10 minutes until crispy and fragrant again.
9. What if my fries turn out limp?
If fries are soggy, increase oven temp slightly and spread them out more during baking.
10. How do I get them evenly crispy?
Use a spatula to flip the fries halfway; this ensures even browning and crispy edges.
These baked sweet potato fries aren’t just a snack—they’re a reminder that caramelization and a bit of smoky depth can turn simple ingredients into something memorable. Each crispy bite carries a warm aroma of roasted sugars and spices, making them perfect for cozy nights or impromptu gatherings.
In a world full of fleeting trends, this humble recipe feels grounding—something you can tweak and make your own, while still honoring that natural sweetness. It’s rare to find a dish that’s both straightforward and deeply satisfying, especially when it comes out of your own oven, crackling and fragrant.

