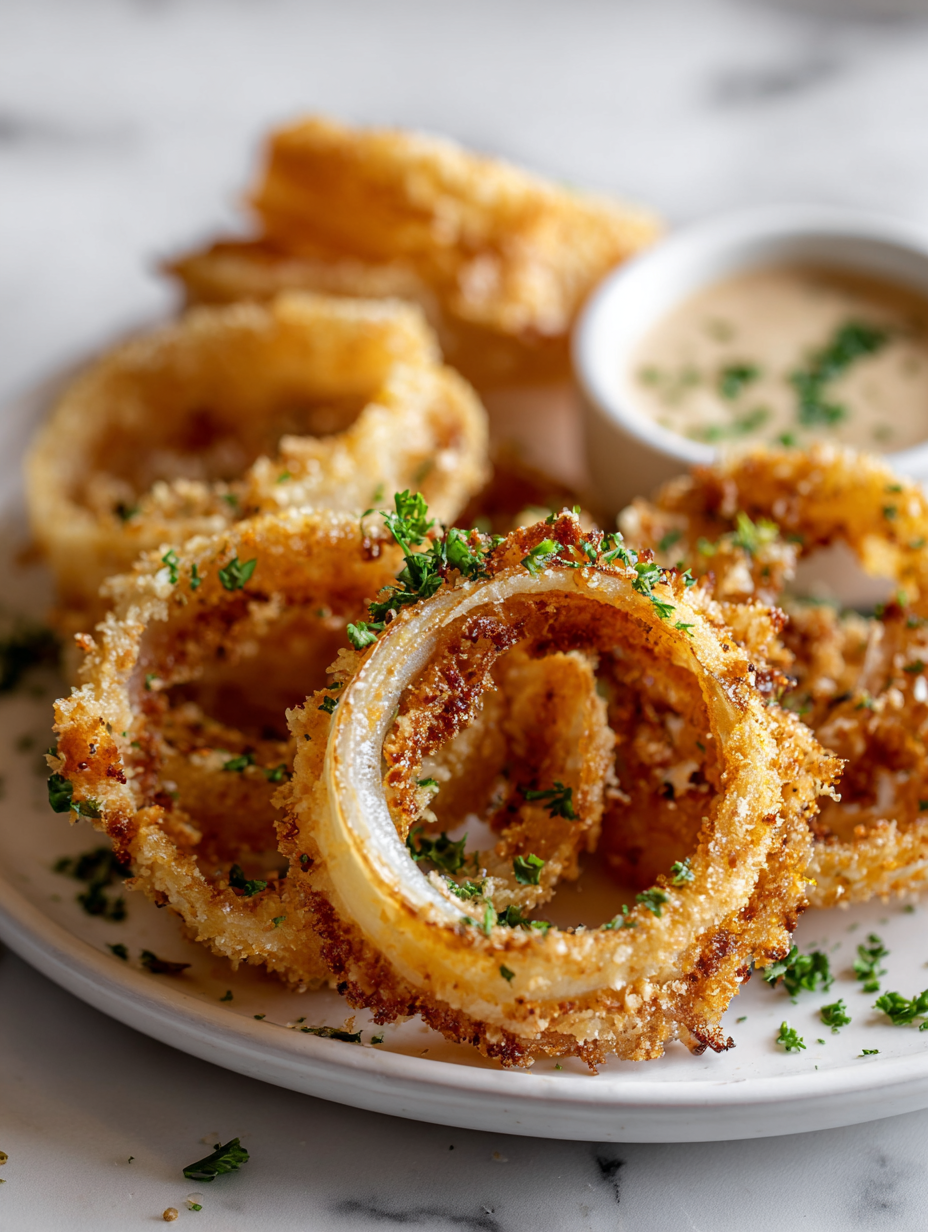
Baking onion rings might sound strange at first, but it’s a quiet revolution in the snack world. No hot oil splatters, no lingering smell of deep-fried fat—just an oven doing its magic. The caramelized edges develop a surprising crunch, while the insides stay tender and sweet, almost like a roasted onion in disguise.
This recipe is a game-changer when you want the satisfying bite of onion rings without the greasy aftermath. It’s perfect for a casual weeknight snack or a less guilt-ridden game day treat. Plus, it’s forgiving—easy to tweak, and it makes your kitchen smell like a cozy onion patch in fall.
Focusing on the surprising crunch and caramelized sweetness that baking brings out in onion rings, this recipe emphasizes a hands-off approach for a more even, less greasy result. It’s about how oven magic can transform a typically fried snack into something with deeper flavor and a crisp bite, without the mess or guilt.
The story behind this recipe
- I first stumbled upon baked onion rings during a busy weekend when I was craving something crispy but wanted to avoid the greasy mess. The idea of oven-baking them, with their sweet, caramelized aroma filling the kitchen, felt like a quiet rebellion against my usual fry-fests. It was a small win, turning a classic comfort food into something a little smarter, yet just as satisfying.
- Ever since, I’ve kept coming back to this method whenever I need that crispy edge but without the oil-drenched aftermath. It’s become a little ritual—set the oven, prep the onions, and wait for that crackle of golden edges. It’s a reminder that sometimes, the simplest tweaks bring out the best in familiar favorites.
- heading: ‘The story behind this recipe’
Key ingredients and tips
- Sweet onions: I like using large yellow onions—they caramelize beautifully and develop a rich, smoky sweetness. Try red onions for a sharper bite, but keep in mind they’ll be a bit more pungent.
- All-purpose flour: It forms the crispy shell that holds everything together. If you want a lighter crust, swap half with rice flour for extra crunch and a delicate texture.
- Panko breadcrumbs: I prefer these for their airy crunch, but if you only have regular breadcrumbs, double them up and toast slightly for extra flavor.
- Egg wash: It’s the glue that makes the coating stick. For a richer flavor, add a splash of milk or a teaspoon of Dijon mustard—just watch the coating become a tad more delicate.
- Spices: I keep it simple with paprika, salt, and pepper, but a pinch of smoked paprika or cayenne can add a smoky or fiery kick. Use sparingly if you’re sensitive to heat.
- Oil spray: I use a quick spritz of neutral oil for a golden finish. For extra flavor, a light drizzle of sesame or walnut oil can add depth, but it’s optional.
- Optional: Parmesan or nutritional yeast: I sprinkle a little for umami, but keep in mind it can burn easily, so add just before baking for that cheesy aroma.
Spotlight on key ingredients
Onions:
- Sweet onions: I like using large yellow onions—they caramelize beautifully and develop a rich, smoky sweetness. Try red onions for a sharper bite, but keep in mind they’ll be a bit more pungent.
- All-purpose flour: It forms the crispy shell that holds everything together. If you want a lighter crust, swap half with rice flour for extra crunch and a delicate texture.
- Panko breadcrumbs: I prefer these for their airy crunch, but if you only have regular breadcrumbs, double them up and toast slightly for extra flavor.
Breadcrumbs & coating:
- Egg wash: It’s the glue that makes the coating stick. For a richer flavor, add a splash of milk or a teaspoon of Dijon mustard—just watch the coating become a tad more delicate.
- Spices: I keep it simple with paprika, salt, and pepper, but a pinch of smoked paprika or cayenne can add a smoky or fiery kick. Use sparingly if you’re sensitive to heat.
- Oil spray: I use a quick spritz of neutral oil for a golden finish. For extra flavor, a light drizzle of sesame or walnut oil can add depth, but it’s optional.
Notes for ingredient swaps
- Sweet onions: I like using large yellow onions—they caramelize beautifully and develop a rich, smoky sweetness. Try red onions for a sharper bite, but keep in mind they’ll be a bit more pungent.
- All-purpose flour: It forms the crispy shell that holds everything together. If you want a lighter crust, swap half with rice flour for extra crunch and a delicate texture.
- Panko breadcrumbs: I prefer these for their airy crunch, but if you only have regular breadcrumbs, double them up and toast slightly for extra flavor.
- Egg wash: It’s the glue that makes the coating stick. For a richer flavor, add a splash of milk or a teaspoon of Dijon mustard—just watch the coating become a tad more delicate.
- Spices: I keep it simple with paprika, salt, and pepper, but a pinch of smoked paprika or cayenne can add a smoky or fiery kick. Use sparingly if you’re sensitive to heat.
- Oil spray: I use a quick spritz of neutral oil for a golden finish. For extra flavor, a light drizzle of sesame or walnut oil can add depth, but it’s optional.
- Optional: Parmesan or nutritional yeast: I sprinkle a little for umami, but keep in mind it can burn easily, so add just before baking for that cheesy aroma.
Equipment & Tools
- Baking sheet: To hold the onion rings during baking, ensuring even heat exposure.
- Parchment paper or silicone mat: Prevent sticking and make cleanup easier.
- Mixing bowls: Separate for flour, egg wash, and breadcrumbs for efficient coating.
- Tongs: Handle onion rings without breaking the coating.
- Spray bottle or oil mister: Evenly coat the rings with oil for crisping without greasiness.
Step-by-step guide to baked onion rings
- Preheat your oven to 200°C (390°F). Line a baking sheet with parchment or a silicone mat for easy cleanup.
- Slice large yellow onions into 1/4-inch thick rings. Keep the rings intact, but separate some for easier coating.
- Prepare your coatings: In one bowl, whisk together 1 cup of all-purpose flour with a pinch of salt and smoked paprika. In another, beat 2 eggs with a splash of water. In a third, spread 1 1/2 cups of panko breadcrumbs seasoned with a little salt and pepper.
- Set up your station: Flour mixture, beaten eggs, breadcrumbs. Have a plate ready for the coated onion rings.
- Dip each onion ring into the flour, shaking off excess. Then coat in the egg wash, letting excess drip off. Finally, dredge in the panko breadcrumbs, pressing lightly to adhere. Place coated rings on the prepared baking sheet.
- Once all rings are coated, spray them lightly with neutral oil or a cooking spray for golden crust. Space them evenly, not touching.
- Bake in the preheated oven for about 20–25 minutes. Halfway through, flip the rings with tongs for even browning. They should turn a crisp, golden brown and smell toasty and sweet.
- Check for doneness: the coating should be crispy, and the onions tender inside. If not crisp enough, bake for an extra 3–5 minutes.
- Remove from oven and let rest for 2 minutes. Serve immediately with your favorite dip or just a squeeze of lemon to enhance the sweetness.
- If they seem soggy, put them back in the oven for 2–3 minutes to crisp up. For extra crunch, briefly broil, but watch carefully to prevent burning.
Let the onion rings rest for 2 minutes after baking to set the crust. Serve hot with dips or lemon wedges for an extra zing.
How to Know It’s Done
- Golden, crispy exterior with no sogginess.
- Onions inside are tender and slightly caramelized.
- Coating is evenly browned and crackly.
Baked Onion Rings
Ingredients
Equipment
Method
- Preheat your oven to 200°C (390°F) and line a baking sheet with parchment paper or a silicone mat for easy cleanup.
- Slice the large yellow onions into 1/4-inch thick rings, keeping them intact but separated into individual rings for easier coating.
- Set up your coating station: place the flour in a bowl, beat the eggs with a splash of water in another, and spread the panko breadcrumbs seasoned with salt, pepper, and smoked paprika in a third.
- Dip each onion ring into the seasoned flour, shaking off any excess to ensure a light coating.
- Next, coat the floured onion ring in the beaten egg mixture, letting any excess drip off.
- Finally, dredge the onion ring in the panko breadcrumbs, pressing lightly to help the coating adhere well.
- Place each coated onion ring on the prepared baking sheet, spacing them evenly apart.
- Lightly spray the onion rings with neutral oil spray for a golden, crispy finish.
- Bake in the preheated oven for 20–25 minutes, flipping the rings halfway through with tongs until they turn golden brown and smell toasty.
- Once baked, remove from the oven and let the onion rings rest for 2 minutes, allowing the coating to set for a perfect crunch.
- Serve these crispy baked onion rings hot, with your favorite dips or a squeeze of lemon to enhance their sweet, caramelized flavor.
Tips for perfect baked onion rings
- Use a light spray of oil to achieve an even, golden crust without greasiness.
- Chill your coated onion rings for 10 minutes before baking to help the crust adhere better.
- Keep the oven at a consistent 200°C (390°F) to prevent uneven browning and sogginess.
- Turn the onion rings halfway through baking for uniform crunch and color.
- For extra crispiness, broil the rings for the last 2 minutes, but watch carefully to avoid burning.
- Use a wire rack on top of the baking sheet to allow excess oil to drain and crisp up all sides.
- If the coating starts to crack or fall off, gently press it back onto the onion rings before baking.
Common mistakes and how to fix them
- OVER-BUFFED: Too much coating causes flakiness—reduce layers for crispness.
- TOO DRY: Dried onion rings won’t crisp—ensure onions are well separated and coated evenly.
- UNDER-BAKED: Insufficient bake time leaves soggy crust—trust the colour and aroma as signs.
- OIL SPLATTER: Not spraying evenly can cause uneven browning—use a fine mist for best results.
Quick fixes and pantry swaps
- When batter is too thick, splash in a little water or milk for easier coating.
- If oil shimmers without crackling, increase oven temperature slightly for better crispness.
- Splash a few drops of lemon juice if onion flavor is too sharp after baking.
- Patch soggy spots by briefly broiling at high heat, watching for burn spots.
- Shield burnt breadcrumbs with a quick sprinkle of fresh herbs or a squeeze of lemon for freshness.
Prep, store, and reheat tips
- Prep the onion rings: Coat and assemble them up to a day in advance, storing in a single layer in the fridge—crispness stays better if not stacked.
- Store leftovers: Keep baked onion rings in an airtight container in the fridge for up to 2 days. The coating softens slightly, but they still taste good.
- Reheating: Bake at 180°C (350°F) for 8-10 minutes until warmed through and crispy again. The smell of caramelized onion reappears with a toasty note.
- Sensory note: Reheated rings may lose some crunch but retain a savory, sweet aroma and tender onion bite—best enjoyed hot, fresh or reheated.
Top questions about baked onion rings
1. How crispy do baked onion rings get?
Baked onion rings can be crispy if baked at high heat and sprayed lightly with oil. It’s all about that golden, crackly coating and tender inside.
2. How do I know when they’re done?
They should be golden brown on the outside, with the onions inside soft and caramelized. A crackling coating and fragrant aroma are signs they’re ready.
3. What kind of onions work best?
Use large yellow onions for sweetness and good caramelization. The coating is best with panko breadcrumbs for airy crunch.
4. How long do I bake them?
Pre-slice your onions and coat them in flour, egg, then breadcrumbs. Bake on a lined sheet at 200°C (390°F) for about 20–25 minutes.
5. Should I flip the onion rings during baking?
Spray lightly with oil before baking for a golden finish. Flip halfway through to ensure even crisping and browning.
6. What if they’re not crispy enough?
Yes, if they appear soggy or unevenly browned. An extra 3–5 minutes in the oven helps crisp them up.
7. Can I substitute ingredients?
You can swap panko breadcrumbs with crushed cornflakes or toasted regular breadcrumbs for different textures. Use gluten-free flour if needed.
8. How do I keep them from getting soggy?
Avoid overcrowding the baking sheet to prevent sogginess. Use a wire rack for even air circulation if possible.
9. How do I reheat leftovers?
Reheat in a 180°C (350°F) oven for 8–10 minutes until hot and crispy again. A quick broil adds extra crunch.
10. What if the coating falls off?
If coating cracks or falls off, gently press it back onto the onion before baking. For uneven browning, rotate the sheet during baking.
Baked onion rings are a simple way to get that satisfying crunch without the mess of frying. They’re perfect for a quick snack or a casual side, especially when you want something warm and savory with a hint of caramel sweetness.
In these quiet moments after baking, I always appreciate how a few humble ingredients can turn into something so flavorful and comforting. It’s a reminder that good food doesn’t have to be complicated or greasy—just honest and well-loved.

