
These baked spinach puffs are a childhood favorite turned grown-up treat. They remind me of the snack foods I loved—crispy, cheesy, a little gooey inside—yet they feel fancy enough for a dinner party or a brunch plate. It’s funny how something so simple can carry so many memories, but also feel fresh and comforting at the same time.
What makes these puffs special is how easily they come together with pantry staples, and how they manage to balance that nostalgic crunch with a sophisticated, flaky pastry. I’ve played around with different cheeses and spinach textures, but the core remains the same—crisp, tender, and packed with flavor that hits just right.
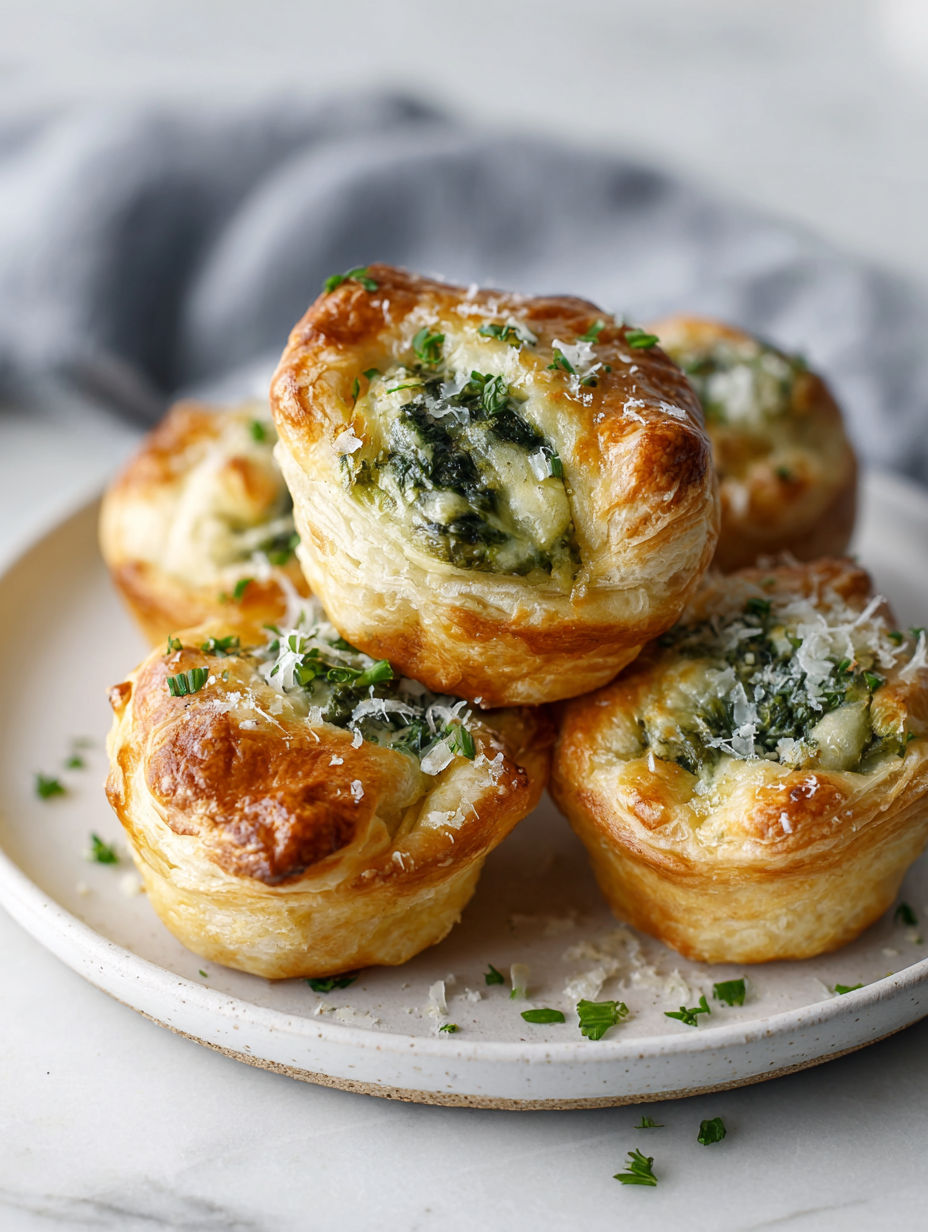
Baking these instead of frying gives them a lighter, more refined feel. Plus, the smell—warm, cheesy, with a hint of garlic—fills the kitchen in the best way. They’re perfect hot from the oven or even reheated, holding onto that flaky, cheesy goodness no matter when you serve them.
Focusing on the nostalgic comfort of childhood snack foods, but reimagined as elegant, baked spinach puffs that blend simplicity with sophistication.
The story behind this recipe
- This recipe came from a lazy Sunday afternoon in my childhood kitchen, where my grandma used to make quick snacks while I’d sit on the counter, stealing bites and watching her fold pastry. I remember the way the spinach and cheese smelled as they baked—like a savory, flaky promise. It’s funny how those little moments stuck with me and turned into this dish, a mix of nostalgia and a desire to make something both simple and special.
- I’ve tweaked the original to make it easier for a weeknight, but I still keep that feeling of comfort at the core. It’s about those crispy edges, the gooey cheese, and that burst of fresh spinach in every bite. It reminds me that sometimes, the best recipes are the ones that connect us to memory, but also stand strong on their own—flaky, cheesy, and full of life.
- heading
- story_type
Key Ingredients Breakdown
- Fresh spinach: I love the bright, slightly bitter aroma of wilted spinach. If yours is too wet, squeeze out excess moisture to keep the puffs crisp.
- Cheese (Gruyère or sharp cheddar): The gooey melt and savory punch make or break these. For a milder flavor, swap in mozzarella, but don’t skip that cheesy stretch.
- Pastry dough: I prefer store-bought puff pastry for ease, but homemade flaky dough adds a richer, buttery layer—if you have time, give it a shot.
- Garlic: The pungent aroma when sautéing garlic is my signal—if it turns brown too fast, turn down the heat to keep it fragrant and not bitter.
- Egg wash: It gives a beautiful golden hue and a slight crunch. For a vegan version, brush with almond milk, but be aware it won’t be quite as shiny.
- Nutmeg: Just a pinch brings warmth and depth to the filling. Skip it if you prefer a more straightforward, fresh spinach flavor.
- Salt & pepper: Always taste and adjust—these simple seasonings amplify the cheese’s richness and the spinach’s freshness.
Spotlight on key ingredients
Spinach and Cheese:
- Fresh spinach: I love the bright, slightly bitter aroma of wilted spinach. If yours is too wet, squeeze out excess moisture to keep the puffs crisp.
- Cheese (Gruyère or sharp cheddar): The gooey melt and savory punch make or break these. For a milder flavor, swap in mozzarella, but don’t skip that cheesy stretch.
- Pastry dough: I prefer store-bought puff pastry for ease, but homemade flaky dough adds a richer, buttery layer—if you have time, give it a shot.
Ingredient Swap Tips
- Dairy-Free: Swap out cheese for a nut-based cheese or nutritional yeast for cheesy flavor without the dairy, though expect a slightly different melt and richness.
- Vegan: Use plant-based puff pastry and substitute cheese with vegan cheese or blended silken tofu to mimic creaminess and texture.
- Gluten-Free: Replace puff pastry with a good-quality gluten-free flaky dough or a homemade blend, which might be a bit denser but still flaky.
- Low-Sodium: Opt for unsalted cheese and control added salt carefully; use herbs and spices to boost flavor without extra salt.
- Extra Cheesy: Add a sprinkle of grated Parmesan or a stronger cheese like aged Gouda for a more pronounced cheese flavor, which enhances the savory punch.
- Fresh Herbs: Incorporate chopped dill, basil, or thyme into the filling for a fresh, aromatic twist that complements the spinach.
- Spicy Kick: Mix in a dash of chili flakes or smoked paprika into the filling for a subtle heat that balances the richness.
Equipment & Tools
- Baking sheet: To hold the puffs during baking and ensure even heat distribution.
- Parchment paper: Prevents sticking and makes cleanup easier.
- Rolling pin: To roll out the puff pastry evenly.
- Sharp knife or pizza cutter: To cut the pastry into uniform squares.
- Pastry brush: To brush egg wash or almond milk for a shiny finish.
- Skillet: To sauté the spinach and garlic.
Step-by-step guide to baking
- Preheat your oven to 200°C (390°F). Line a baking sheet with parchment paper to prevent sticking.
- Thaw the puff pastry sheets at room temperature for about 15 minutes. Keep them cold but pliable.
- In a skillet, heat a tablespoon of olive oil over medium heat (about 160°C/320°F). Add 2 minced garlic cloves; cook until fragrant, about 30 seconds. Stir in 4 cups of chopped fresh spinach; cook until wilted and moisture evaporates, about 2-3 minutes. Remove from heat and let cool slightly.
- In a mixing bowl, combine 1 cup grated cheese (Gruyère or sharp cheddar), the cooled spinach mixture, and a pinch of nutmeg. Season with salt and pepper to taste. Mix thoroughly to combine.
- On a lightly floured surface, unfold a sheet of puff pastry. Roll it out gently to smooth creases and slightly increase size. Cut into 9 equal squares, roughly 10×10 cm (4×4 inches).
- Place a heaping teaspoon of filling in the center of each pastry square. Fold each corner into the center to form a pinwheel or leave as a square, sealing edges with a little water if needed.
- Arrange the filled puffs on the prepared baking sheet, spacing them about 2 cm apart. Brush the tops with a beaten egg (or almond milk for vegan).
- Bake in the preheated oven for 20-25 minutes, until golden and puffed. Check visually for a crispy, flaky exterior and bubbling cheese.
- Once baked, remove from oven and let rest for 5 minutes. Serve warm or at room temperature, enjoying the flaky layers and melty filling.
- For best results, reheat in a 180°C (355°F) oven for 8-10 minutes until crisp again. Avoid microwaving, which softens the puff pastry.
Let the puffs rest on a wire rack for 5 minutes before serving. Serve warm, with a sprinkle of sea salt or a simple salad.
How to Know It’s Done
- Puffs are golden brown and crispy on top.
- Cheese filling is bubbling and hot inside.
- Pastry layers are flaky and not soggy.
Baked Spinach Puffs
Ingredients
Equipment
Method
- Preheat your oven to 200°C (390°F) and line a baking sheet with parchment paper.
- Thaw the puff pastry sheets at room temperature for about 15 minutes until they are pliable but still cold.
- In a skillet, heat a tablespoon of olive oil over medium heat, then add the minced garlic and cook until fragrant, about 30 seconds.
- Add the chopped spinach to the skillet and cook until wilted and moisture has evaporated, about 2-3 minutes. Let it cool slightly as it might be hot and moist.
- In a bowl, combine the grated cheese, cooled spinach mixture, a pinch of nutmeg, and season with salt and pepper. Mix until evenly combined, creating a flavorful filling.
- Unfold the puff pastry sheets onto a lightly floured surface and roll gently to even out the creases, increasing their size slightly.
- Cut each sheet into 9 equal squares, about 10x10 cm (4x4 inches), using a sharp knife or pizza cutter.
- Place a teaspoon of filling in the center of each square, then fold the corners into the middle to form a pinwheel or leave as a square, sealing edges with a little water if needed.
- Arrange the filled puffs on the prepared baking sheet, spacing them about 2 cm apart. Brush the tops with beaten egg for a shiny, golden finish.
- Bake in the preheated oven for 20-25 minutes, until golden brown and crispy, with cheese bubbling inside and layers puffed up.
- Remove from oven and let rest for 5 minutes on a wire rack to set the filling and enhance crispness. Serve warm and enjoy the flaky, cheesy bites.
Pro tips for perfect baked spinach puffs
- Use a hot oven (200°C/390°F) for quick, even baking.
- Keep pastry cold until use to ensure flaky layers.
- Sauté spinach until wilted and moisture evaporates for crisp puffs.
- Brush with egg wash immediately before baking for golden tops.
- Check for bubbling cheese and golden edges as signs of readiness.
- Rest baked puffs 5 minutes to set filling and prevent sogginess.
- Adjust oven rack to middle for even heat distribution and perfect rise.
Common mistakes and how to fix them
- FORGOT to drain excess moisture from spinach → Squeeze out water for crisp puffs.
- DUMPED the filling directly onto pastry → Spread evenly to avoid bursting during baking.
- OVER-TORCHED the edges → Cover with foil if edges brown too fast, prevent burning.
- MISSED the egg wash step → Brush pastry for golden, shiny finish and flaky layers.
Kitchen Fixes for Flawless Puffs
- When the puffs turn soggy, splash them with a quick spray of water and bake 5 more minutes.
- If filling leaks, patch with a small dab of extra pastry dough before baking to seal cracks.
- Over-torched edges? Shield with foil mid-bake to prevent burning while the center finishes.
- Forgot to pre-chill the pastry? Rescue with a few minutes in the freezer before filling to keep layers flaky.
- When cheese isn’t bubbling enough, increase oven temperature by 10°C (20°F) for the last 3 minutes.
Make-Ahead and Storage Tips
- Prepare the spinach filling and assemble the puffs up to a day in advance; keep covered in the fridge. The flavors deepen overnight, and the pastry stays crisp if kept cold.
- Store baked puffs in an airtight container at room temperature for up to 2 hours or in the fridge for up to 24 hours. Reheat in a 180°C (355°F) oven for 8-10 minutes until crispy and hot—listen for that satisfying crackle.
- For longer storage, freeze baked puffs for up to 1 month. Reheat directly from frozen, adding 5-7 minutes to the baking time, until golden and bubbling inside.
- Reheating can soften the pastry, so for best texture, reheat in the oven rather than microwave. The smell of melted cheese and flaky layers will tell you when they’re ready.
Top questions about baked spinach puffs
1. Can I use frozen spinach?
Use fresh spinach for the best flavor and texture. Frozen spinach can be used, but squeeze out excess water thoroughly to prevent sogginess.
2. Can I swap the cheese?
Yes, you can substitute other cheeses like mozzarella or Monterey Jack, but the flavor and melt will differ slightly.
3. How do I store leftovers?
Store leftovers in an airtight container in the fridge for up to 24 hours. Reheat in a hot oven until crispy, about 8-10 minutes.
4. Can I prepare the filling ahead?
Yes, you can make the filling ahead and keep it covered in the fridge for up to a day. Assemble just before baking for best crispness.
5. How important is the egg wash?
Use a pastry brush to evenly coat the puffs with egg wash before baking. This gives them that lovely golden, flaky finish.
6. How do I know when they’re done?
Bake the puffs until they are golden brown and crispy on the outside, with bubbling cheese inside. The pastry should be flaky and puffed.
7. What if they turn soggy?
If the puffs turn soggy, re-crisp them in a hot oven for a few minutes. For a quick fix, spray with water and bake briefly.
8. How should I cut the pastry?
Use a sharp knife or pizza cutter for clean, even cuts. Keep the pastry cold before cutting to prevent sticking and tearing.
9. Can I make these dairy-free?
For a dairy-free version, try nutritional yeast or vegan cheese, but expect a different melt and flavor profile.
10. Can I freeze baked or unbaked puffs?
Yes, you can freeze assembled puffs before baking for up to a month. Bake directly from frozen, adding a few extra minutes.
These baked spinach puffs are a reminder that comfort food can also be elegant and effortless. The crispy exterior paired with that cheesy, savory filling makes them a satisfying bite no matter the occasion. They’re imperfectly perfect, just like homemade food should be.
Whenever I make these, I’m transported back to childhood kitchens, but I also feel a quiet pride in turning simple ingredients into something special. They’re a little messy, a little nostalgic, and always delicious—perfect for sharing or just keeping all to yourself.

