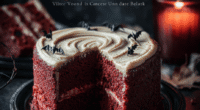
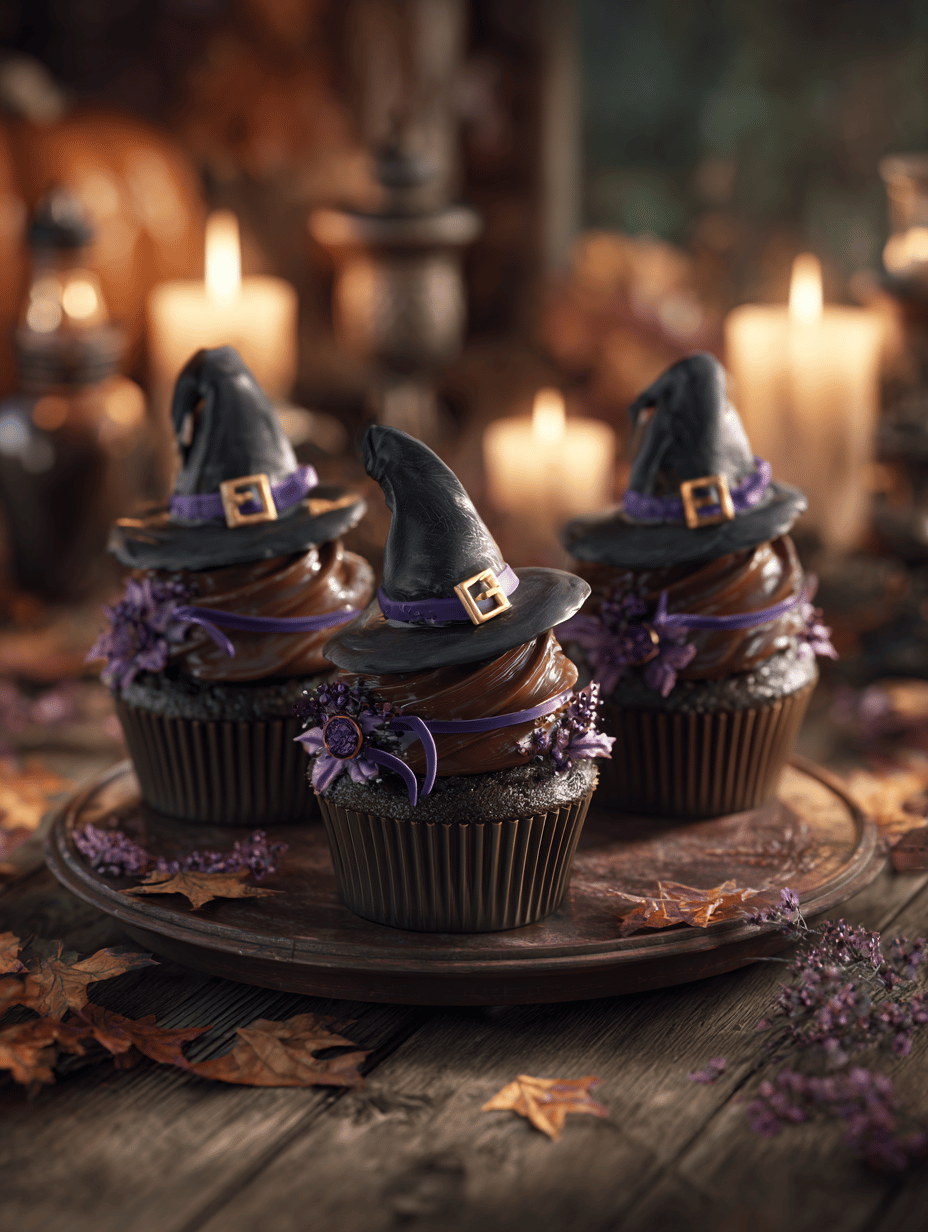
Witch hat cupcakes are more than just a cute Halloween treat — they’re a way to add a little magic to your baking routine. I’ve always loved how a simple cupcake can turn into a tiny costume, especially when you get to pipe the frosting like a spell’s swirl. This recipe is about more than looks; it’s about capturing that playful spirit and making something that feels festive and fun, even in a rushed moment.
Why I Keep Coming Back to These Witch Hats
They’re delightfully simple but endlessly customizable. The smile on kids’ faces when they see the tiny hats is priceless. Plus, the process of piping and decorating turns into a mini ritual I look forward to. It’s a nostalgic nod to childhood Halloweens, wrapped in a fun baking adventure.
What’s in the Cauldron? Key Ingredients Breakdown
- All-purpose flour: Gives structure. Use cake flour for a softer crumb.
- Cocoa powder: Rich, dark, and oozing with deep chocolate flavor. Dutch-processed for a smoother taste.
- Cream cheese: Adds tang and creaminess to the frosting. Full-fat makes it rich.
- Food coloring gel: Dark for the hats, bright for contrast. Use sparingly to avoid mess.
- Mini cookies or chocolate chips: Tiny accessories for the hat brim. Crunchy and sweet.
- Vegetable oil: Keeps the cupcakes moist and tender. Substitute with melted butter for extra flavor.
- Powdered sugar: Sweetens and thickens the frosting. Adjust for sweetness and consistency.
Tools of the Trade for Witch Hat Cupcakes
- Muffin tin and paper liners: Shape and contain your cupcakes during baking.
- Electric mixer or whisk: Ensure smooth batter and fluffy frosting.
- Piping bag with star tip: Create that classic swirling frosting look.
- Cooling rack: Help cupcakes cool evenly and prevent sogginess.
- Small spoon or tweezers: Decorate with tiny candies or cookie pieces precisely.
Step-by-step Guide to Crafting Your Witch Hat Cupcakes
Step 1: Preheat your oven to 180°C (350°F).
Step 2: Line a muffin tin with paper liners.
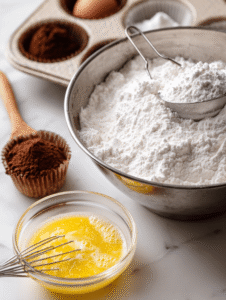
Step 3: Mix the dry ingredients: flour, sugar, cocoa powder, baking powder, salt.
Step 4: In a separate bowl, whisk together wet ingredients: eggs, milk, vegetable oil, vanilla.
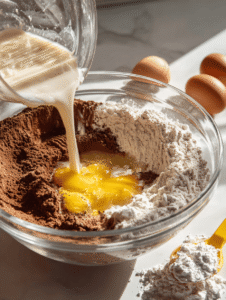
Step 5: Combine dry and wet ingredients until just mixed, don’t overbeat.
Step 6: Fill cupcake liners about 2/3 full with batter.
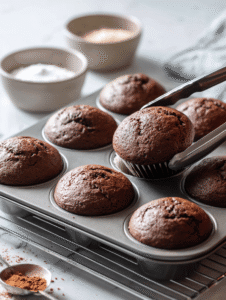
Step 7: Bake for 18-20 minutes, until a toothpick inserted in the center comes out clean.
Step 8: Let cupcakes cool in the tin for 5 minutes, then transfer to a wire rack.
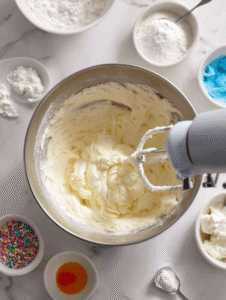
Step 9: Prepare frosting: beat butter, cream cheese, and powdered sugar until fluffy.
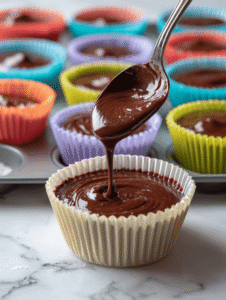
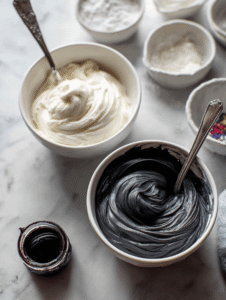
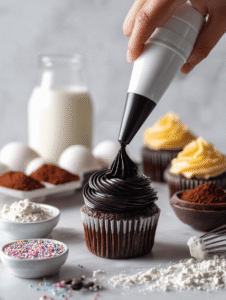
Step 10: Tint frosting black or dark gray with gel food coloring.
Step 11: Use a piping bag to swirl frosting onto cooled cupcakes.
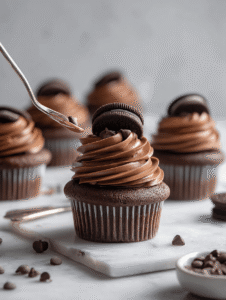
Step 12: Decorate with mini cookies or chocolate pieces for the hat brim.
Catching the Magic: Tips and Tricks During Baking
- Cupcakes should be domed and spring back when lightly pressed.
- Frosting should be smooth and firm enough to pipe without sliding.
- Watch for overbaking: golden edges mean they’re done.
- If cupcakes crack on top, reduce oven temperature slightly and avoid overmixing batter.
Common Mistakes and How to Correct Them
- Oven wasn’t hot enough, causing uneven baking.? FORGOT to preheat oven → Always set oven early, so it’s at temp when ready.
- Cupcakes overflow or crack.? DUMPED too much batter in liners → Fill only 2/3 to avoid overflow.
- Burnt edges and dry cupcakes.? OVER-TORCHED edges → Reduce oven temp or bake for less time.
- Frosting slides off or loses shape.? Frosting is too soft → Chill frosting before piping.
Witch Hat Cupcakes
Ingredients
Equipment
Method
- Preheat your oven to 180°C (350°F) and line a muffin tin with paper cupcake liners. In a large bowl, sift together the flour, cocoa powder, sugar, baking powder, and salt until well combined. In a separate bowl, whisk together the eggs, milk, vegetable oil, and vanilla extract until smooth and slightly frothy.
- Gradually add the wet ingredients to the dry mixture, stirring gently until just combined. The batter should be smooth and slightly thick. Avoid overmixing to keep the cupcakes light and tender.
- Using a spoon or scoop, fill each cupcake liner about two-thirds full with the batter. This ensures they have room to rise without overflowing. Bake for 18-20 minutes, or until a toothpick inserted into the center comes out clean and the cupcakes are domed and springy to the touch.
- Remove the cupcakes from the oven and let them cool in the tin for 5 minutes. Then transfer them to a wire rack to cool completely. The cupcakes should be moist, with a rich chocolate aroma and a slightly domed top.
- While the cupcakes cool, prepare the frosting. In a mixing bowl, beat the softened butter and cream cheese together until creamy and smooth. Gradually add the sifted powdered sugar and beat until fluffy. The frosting should be thick enough to hold its shape when piped.
- Divide the frosting into two bowls. Tint one portion with the black or dark gray gel food coloring, mixing until the color is uniform. This will be your hat color. Keep the other portion plain or lightly tinted for contrast if desired.
- Fit a piping bag with a star tip and fill it with the dark frosting. Pipe a generous swirl onto each cooled cupcake, starting from the center and spiraling outward to create a conical hat shape.
- Decorate the base of each hat with mini cookies or chocolate chips, placing them carefully around the frosting to resemble a brim. Use small tweezers or a spoon for precise placement if needed. Add tiny candies or decorations for extra flair if desired.
- Once decorated, chill the cupcakes for about 15-20 minutes so the frosting firms up and stays in place. Then, serve your magical witch hat cupcakes and enjoy their festive charm!


