Halloween bark is one of those recipes that feels like an instant mood lift. The best part? It’s forgiving, flexible, and a little bit chaotic—just like a good haunted house. I love how it turns simple ingredients into something both spooky and beautiful, perfect for last-minute parties or a quiet night of ghoulish snacking.
Why I Keep Coming Back to This Halloween Bark
It’s chaotic charm, quick to assemble, and endlessly customizable. Every batch turns out slightly different, which keeps it fun. Plus, it’s the kind of treat that sparks joy in the middle of a hectic season, making it perfect for last-minute Halloween prep.
Ingredient Breakdown: What Makes This Bark Special
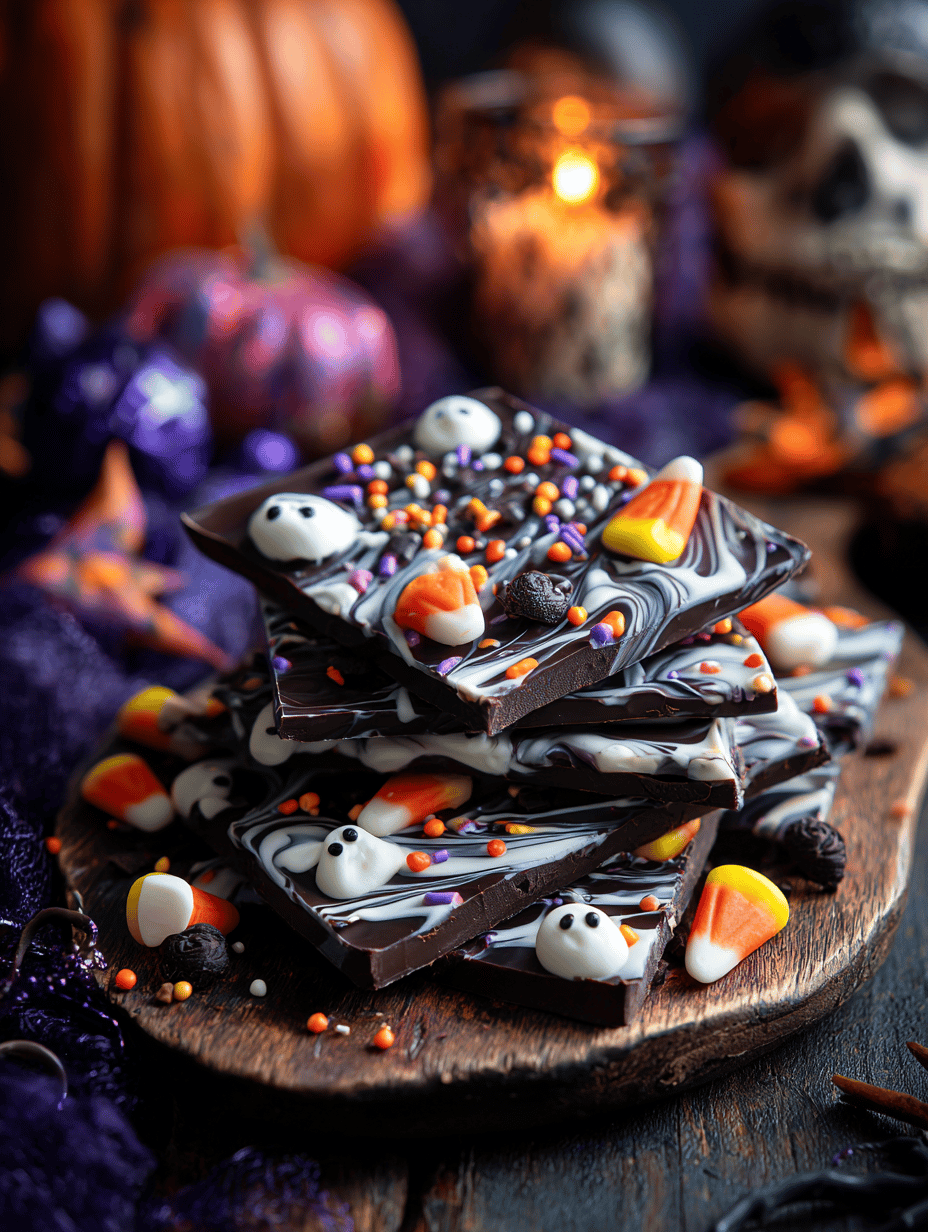
- Dark or milk chocolate: The base—melts smoothly, delivering a rich, velvety sweetness that melts on your tongue.
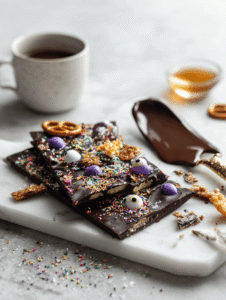
- Candy eyes or spooky toppings: Add a creepy crunch and a pop of color, making your bark instantly more horrifying.
- Crushed cookies or pretzels: Offer a salty crunch that balances the sweetness—think salty-sweet chaos.
- Sprinkles or edible glitter: A shimmer of sparkle, like tiny haunted stars, that catches the light.
- Optional flavorings like peppermint or orange zest: A zing of brightness that cuts through the richness—use sparingly.
Tools and Tricks for Spooky Success
- Double boiler or microwave: Melt chocolate smoothly without burning.
- Spatula: Spread melted chocolate evenly on the sheet.
- Baking sheet lined with parchment or silicone mat: Provide a sturdy base for the bark to set.
- Knife or breaker: Break the hardened bark into jagged pieces.
Crafting the Perfect Halloween Bark
Step 1: Line a baking sheet with parchment paper or a silicone mat.
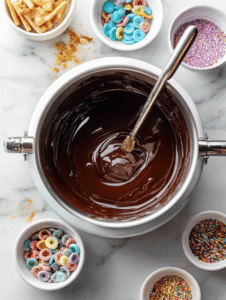
Step 2: Melt the chocolate: use a double boiler or microwave in 30-second bursts, stirring in between.
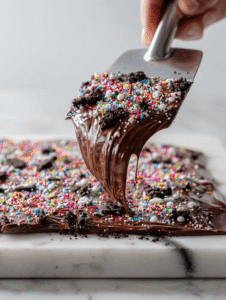
Step 3: Pour the melted chocolate onto the prepared sheet, spreading it evenly with a spatula.
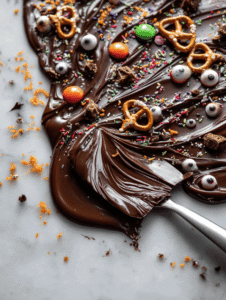
Step 4: Add your spooky toppings—think crushed cookies, candy eyes, or sprinkles—before the chocolate sets.
Step 5: Let the bark cool at room temperature for about 30 minutes or chill in the fridge for 15 minutes.
Step 6: Once hardened, break into irregular pieces—each one unique and jagged.
Creepy Cooking Checks and Tips
- Chocolate should be smooth and glossy, not grainy or dull.
- Toppings should stick well; press them in gently but firmly.
- The bark should crack cleanly when broken; it’s ready when it’s firm to the touch.
- Avoid overheating the chocolate to prevent it from seizing or burning.
Common Halloween Bark Blunders and How to Fix Them
- Overheated chocolate causing clumping.? If the chocolate seizes, stir in a teaspoon of vegetable oil to smooth it out.
- Toppings sliding off.? Dab toppings gently to avoid sinking, use less or press in deeper.
- Uneven breaks.? If the bark cracks unevenly, chill longer or warm slightly before breaking.
- Burnt chocolate.? Prevent burning by melting chocolate in short bursts and stirring constantly.
Halloween Bark
Ingredients
Equipment
Method
- Line a baking sheet with parchment paper or a silicone mat to prepare for the chocolate.
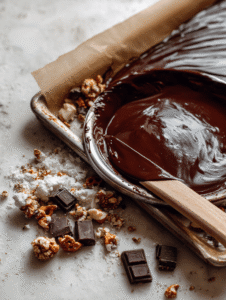
- Melt the chocolate using a double boiler or microwave in 30-second bursts, stirring after each until smooth and glossy.
- Pour the melted chocolate onto the prepared sheet and spread it evenly with a spatula to create a thick, smooth layer.

- Add your spooky toppings—press candy eyes, crushed cookies, sprinkles, or glitter gently into the surface of the chocolate before it sets.
- Let the bark cool at room temperature for about 30 minutes or chill in the fridge for 15 minutes until fully hardened.
- Once set, break the chocolate into irregular jagged pieces with a knife or by hand for a natural, spooky look.

- Enjoy your festive Halloween bark, perfect for sharing or indulging in a ghoulish treat!