Baking breaded shrimp might seem simple, but it’s the little tricks that make all the difference. Instead of deep-frying, I’ve learned to get that perfect crispy shell in the oven—less oil, less mess, still plenty of crunch. It’s honestly my go-to for a quick, satisfying snack or a casual dinner side.
There’s a charm to this method that’s hard to beat. The smell of toasted breadcrumbs mingling with shrimp’s briny aroma fills the kitchen, making everything feel a bit more special. Plus, knowing I can get a crispy outside without standing over hot oil makes it feel like a small victory every time.
This recipe is a nod to those busy weeknights when I want something crunchy and tender without the fuss of frying. It’s a simple swap—bake instead of fry—and surprisingly, it’s just as satisfying. A little less guilt, a little more ease, and still that irresistible bite.
Focusing on the lesser-known technique of oven-baking breaded shrimp for a healthier, less messy alternative to frying, while maintaining that crispy exterior and juicy interior.
The story behind this recipe
- This recipe came together one rainy afternoon when I was craving something crispy but didn’t want the fuss of frying. I remembered a quiet dinner I had at a seaside cottage years ago, where everything was baked, yet still packed with flavor. That memory stuck with me—how the smell of toasted breadcrumbs and seafood can turn a simple meal into something nostalgic.
- I started experimenting with oven-baking breaded shrimp after a failed attempt at shallow frying left the coating soggy. The oven’s dry heat surprisingly crisps up the crust without burning, and I realized I could get that perfect crunch with less oil and mess. It’s become my go-to when I want a quick, satisfying bite that’s still a little special.
- heading
- story_type
Ingredient breakdown
- Shrimp: I prefer peeled, deveined, and tails-off for easier eating. Fresh shrimp should smell briny—avoid any fishy aroma, or give it a quick rinse and pat dry.
- Breadcrumbs: I like panko for extra crunch, but seasoned ones add a nice flavor boost. Toast them lightly before coating to deepen that nutty aroma.
- Egg wash: It’s the glue that keeps the breading on. Use a beaten egg with a splash of water—if it’s too thick, the coating won’t stick well.
- Oil spray: A good even spray helps crisp the coating without greasiness. Avoid too much; just a light mist is enough for that golden finish.
- Spices & herbs: I toss in a pinch of paprika and garlic powder—adds smoky depth and aroma. Feel free to customize with cayenne or Italian herbs depending on your mood.
- Lemon juice: Brightens everything up. A squeeze before serving makes the shrimp feel fresh and zesty, balancing the richness of the coating.
Spotlight on Key Ingredients
Shrimp:
- I prefer peeled, deveined, and tails-off for easier eating. Fresh shrimp should smell briny—avoid any fishy aroma, or give it a quick rinse and pat dry.
- Breadcrumbs: I like panko for extra crunch, but seasoned ones add a nice flavor boost. Toast them lightly before coating to deepen that nutty aroma.
Egg Wash & Oil:
- Egg wash: It’s the glue that keeps the breading on. Use a beaten egg with a splash of water—if it’s too thick, the coating won’t stick well.
- Oil spray: A good even spray helps crisp the coating without greasiness. Avoid too much; just a light mist is enough for that golden finish.
Notes for ingredient swaps
- Dairy-Free: Use almond milk or water instead of egg wash—won’t be as sticky, but still helps coating stick.
- Gluten-Free: Swap panko for crushed rice crackers or gluten-free breadcrumbs—adds crunch but with a different flavor profile.
- Spicy Kick: Replace paprika with smoked paprika or cayenne—adjust heat level to your taste.
- Citrus Brightness: Lime juice can replace lemon—offers a slightly different tang but same fresh lift.
- Breadcrumbs: Toasted coconut flakes can add a sweet, nutty crunch—experiment in small batches first.
Equipment & Tools
- Baking sheet: To hold the shrimp during baking.
- Parchment paper or silicone mat: For non-stick, easy cleanup.
- Three shallow dishes: For flour, eggs, and breadcrumbs for coating.
- Tongs or fingers: To handle the shrimp without mess.
- Cooking spray or oil mister: To lightly coat for crunch.
Step-by-step guide to baked shrimp
- Preheat your oven to 200°C (390°F). Line a baking sheet with parchment paper or a silicone mat for easy cleanup.
- Prepare the breading station: set out three shallow dishes—one with flour, one with beaten eggs, and one with panko breadcrumbs mixed with spices.
- Peel and devein the shrimp if not already done. Pat them dry thoroughly with paper towels to remove excess moisture.
- First, coat each shrimp in flour, shaking off the excess. This helps the egg adhere better.
- Next, dip the floured shrimp into the beaten eggs, ensuring an even coating. Let any excess drip off.
- Finally, roll the shrimp in the seasoned panko breadcrumbs, pressing gently to stick the coating well.
- Arrange the breaded shrimp on the prepared baking sheet in a single layer, leaving space between each piece.
- Spray the shrimp lightly with cooking spray or drizzle with a tiny bit of oil for extra crispness.
- Bake in the oven for about 12-15 minutes. Halfway through, flip them gently to promote even browning.
- Check for a golden-brown color and a firm, crispy crust. The shrimp should be opaque and pink inside.
- Once done, remove from oven and let rest for 2 minutes. Serve immediately with lemon wedges or your favorite dipping sauce.
Let the shrimp rest for a couple of minutes to set the crust. Serve hot with lemon wedges or your preferred dipping sauce. For best texture, enjoy immediately while crispy.
How to Know It’s Done
- Coating is golden and crispy, not soggy or pale.
- Shrimp are opaque and pink, with no translucent parts.
- Crust crackles when touched, indicating crispness.
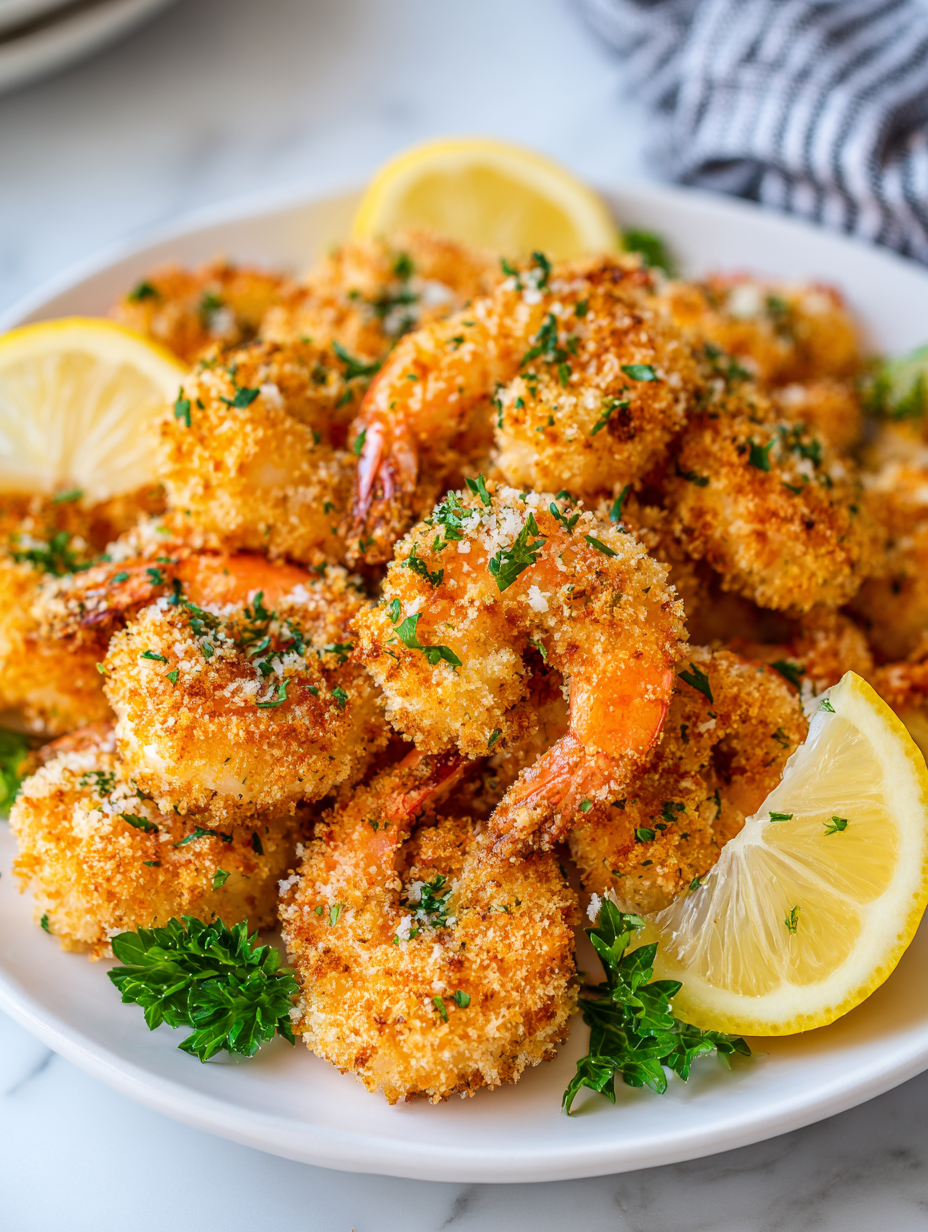
Oven-Baked Crispy Breaded Shrimp
Ingredients
Equipment
Method
- Preheat your oven to 200°C (390°F) and line a baking sheet with parchment paper or a silicone mat for easy cleanup.
- Set out three shallow dishes: one with flour, one with beaten egg mixed with a splash of water, and one with toasted panko breadcrumbs combined with spices.
- Pat the thawed shrimp dry with paper towels to remove excess moisture, which helps the coating stick better.
- First, coat each shrimp in the flour, shaking off the excess to create a light, even layer.
- Next, dip the floured shrimp into the beaten egg, ensuring it’s fully coated, then let any excess drip off.
- Finally, press the shrimp into the seasoned panko breadcrumbs, pressing gently to make sure the coating adheres well.
- Place the breaded shrimp in a single layer on the prepared baking sheet, leaving space between each piece for even crisping.
- Lightly spray the shrimp with oil using a spray bottle or oil mister to encourage golden, crispy edges.
- Bake in the oven for about 12-15 minutes, flipping the shrimp halfway through, until they’re golden brown and crispy.
- Remove the shrimp from the oven, let them rest for a couple of minutes, then squeeze fresh lemon juice over them for a bright, zesty finish.
- Serve immediately for the best crunch, accompanied by lemon wedges or your favorite dipping sauce.
Notes
Pro tips for crispy baked shrimp
- & crispy: Use panko breadcrumbs for maximum crunch, and toast them lightly before coating for a nutty aroma.
- Even spray: Lightly mist the shrimp with cooking spray before baking to achieve a golden, crackling crust.
- Temperature check: Bake at 200°C (390°F) and look for a deep golden color—shrimp should be opaque and firm.
- Proper coating: Dip shrimp in flour, then egg, then breadcrumbs—press gently to ensure the coating sticks without clumping.
- Avoid sogginess: Ensure shrimp are dry before breading; excess moisture causes the coating to slide off or become soggy.
- Flip halfway: Turn shrimp after 6-7 minutes to promote even browning and crispy texture on all sides.
- Rest briefly: Let baked shrimp rest for 2 minutes after removing from oven—this helps set the crust and keeps it crispy.
Common mistakes and how to fix them
- TOO MUCH OIL: Use a light spray; excess oil causes soggy coating and smoke.
- UNDERSALTING: Salt the shrimp before breading for better flavor penetration.
- OVERCOOKING: Shrimp turn rubbery if baked too long; watch for opaque, pink color.
- FROZEN SHRIMP: Thaw thoroughly and pat dry; excess moisture hampers crispiness.
Quick fixes and pantry swaps
- When burnt breadcrumbs, splash a little water into the oven to loosen the char and reset the smell.
- If shrimp stick together, dump in ice water briefly to separate before baking again.
- Overcooked shrimp? Patch with a squeeze of fresh lemon to mask dryness and add brightness.
- Dumped too much oil? Shield with a paper towel and reduce oil spray next time for crispness without greasiness.
- When breadcrumbs aren’t crisp enough, rescue with a quick 2-minute broil—watch closely for color and crackling.
Prep, store, and reheat tips
- You can bread the shrimp up to 2 hours ahead; keep refrigerated on a plate covered with plastic wrap. The coating stays crispy if kept cold and dry.
- Store cooked shrimp in an airtight container in the fridge for up to 24 hours. Reheating may soften the crust slightly, but a quick broil or oven blast restores crispness.
- Avoid freezing breaded shrimp as the coating can become soggy once thawed. If you must freeze, freeze unbaked shrimp first, then bread and bake fresh.
- Reheat in a hot oven at 180°C (350°F) for 5–7 minutes, until the exterior crackles again. Avoid microwave reheating, which makes the coating rubbery and soggy.
- For best sensory results, reheat until you hear a gentle crackle when pressing the crust and see a deep golden hue.
Top questions about baked shrimp
1. Can I use frozen shrimp?
Use peeled, deveined shrimp for easy eating, and pat them dry so the coating sticks better.
2. How do I keep the coating crispy after baking?
Yes, just make sure to fully thaw and dry the shrimp to avoid soggy coating.
3. Is oil spray necessary?
Lightly spray or brush the shrimp with oil before baking; this helps achieve a golden, crackly crust.
4. How long should I bake the shrimp?
Bake at 200°C (390°F) for about 12-15 minutes, flipping halfway, until the crust is golden and shrimp are opaque.
5. Can I use regular breadcrumbs?
Use panko breadcrumbs for extra crunch, and toast them lightly before coating for more flavor.
6. What if I don’t have panko?
Yes, but panko gives a lighter, crunchier coating. Regular breadcrumbs work fine but may be less crispy.
7. Why is my coating falling off?
Ensure the shrimp are dry before breading; excess moisture causes the coating to slip off or become soggy.
8. How do I know when shrimp are done?
If the shrimp turn rubbery, they are overcooked. Remove them as soon as they are opaque and pink.
9. How do I reheat leftovers without losing crunch?
Reheat in a hot oven or under a broiler for 3-5 minutes until the crust re-crisps and shrimp are hot.
10. What if my shrimp are soggy after reheating?
Use a quick broil and watch closely—within 2-3 minutes, the crust should crackle and turn golden.
This baked shrimp recipe is a reminder that simplicity in the kitchen can still deliver real satisfaction. The crispy coating, the tender shrimp—it’s honest comfort food, no fuss required. It’s a good one to keep in mind when you need something quick and genuinely good.
Every time I make this, I appreciate how easy it is to turn basic ingredients into something a little special. The smell of toasted breadcrumbs and bright lemon makes the whole house feel lively. It’s a simple dish, but it’s the kind that makes you want to come back for more.

