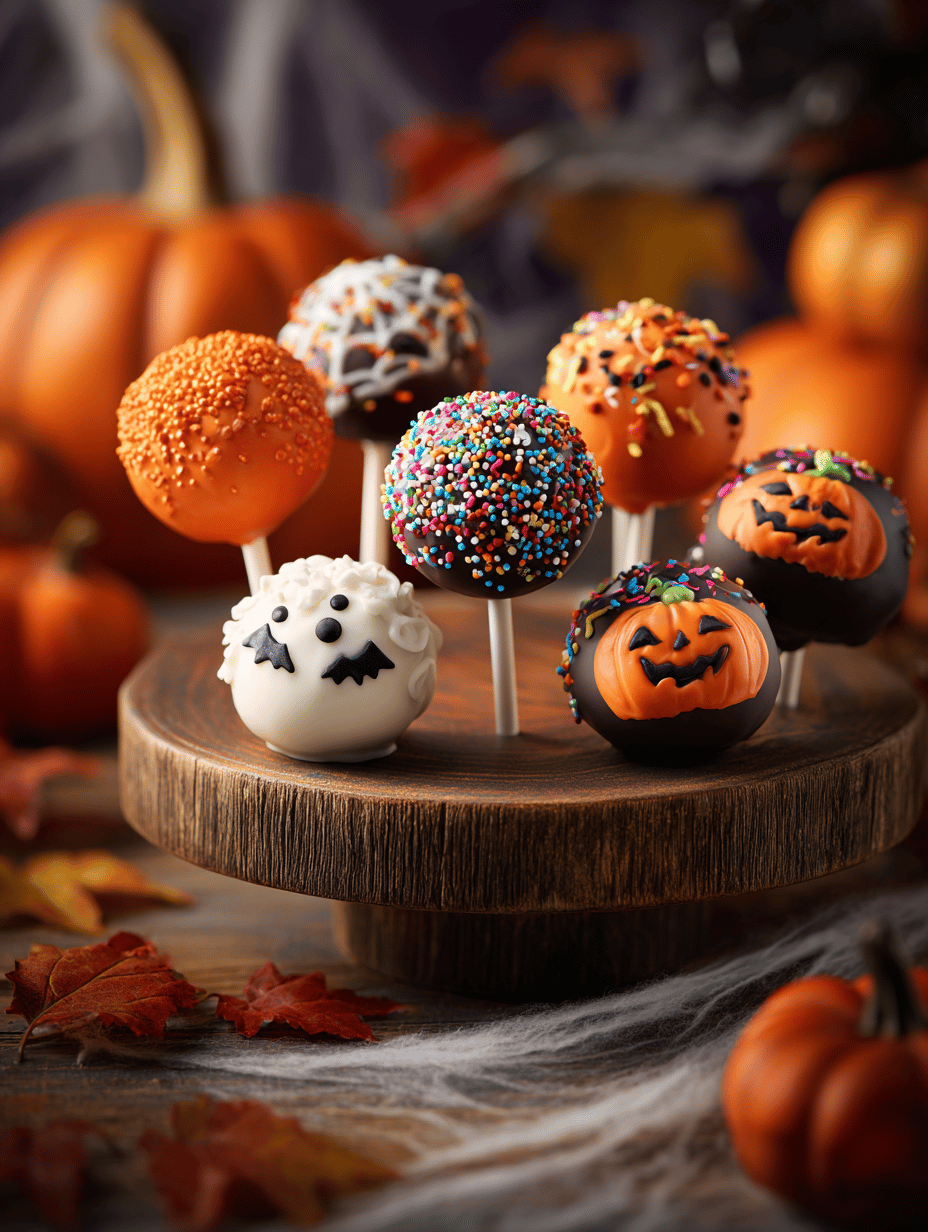
These Halloween cake pops started as a way to turn leftover cake into something fun and portable. They’re a little messy to make but endlessly charming once finished, perfect for a festive mood that doesn’t demand perfection. The best part is customizing the decorations—think spooky faces or creepy eyes with just a few candies.
Why These Cake Pops Keep Calling Me Back
They’re equal parts fun and forgiving, perfect for last-minute chaos. Each batch offers a chance to experiment with decorations and flavors, making every Halloween a little more personal. Plus, they’re just so satisfying to dip and decorate—an easy way to unleash a bit of creative chaos.
Spooky Ingredients & Their Secrets
- Chocolate (dark or milk): Gives that glossy, crisp shell. Use good-quality chocolate for flavor and easy melting.
- Cake (any flavor): The base—moist, crumbly, and perfect for molding into pops.
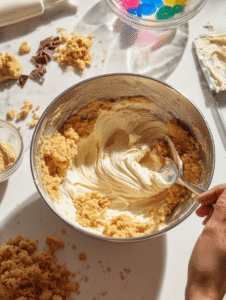
- Frosting: Helps bind the cake crumbs. Vanilla or cream cheese work well, but skip overly sweet varieties.
- Candy eyes and sprinkles: Add the creepy and cute details. Look for edible decorations or make your own with icing.
- Lollipop sticks: Solid support to hold the pops. Wooden or plastic, both work fine.
- Food coloring (gel or liquid): For spooky accents. Be careful not to add too much, or it’ll thin out the chocolate.
Tools of the Spook-Trade
- Double boiler or microwave-safe bowl: To melt chocolate gently without burning.
- Mixing bowls: To combine cake crumbs and frosting.
- Baking sheet lined with parchment: To hold and chill cake balls.
- Lollipop sticks: To turn cake balls into pops.
- Styrofoam block or cake pop stand: To hold pops upright while they set.
Step-by-Step to Spooky, Delicious Cake Pops
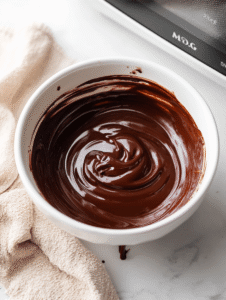
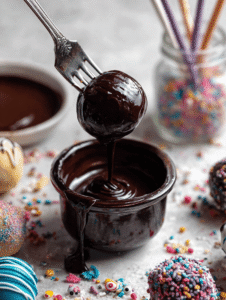
Step 1: Start with melting your chocolate in a heatproof bowl over a double boiler, or carefully in short bursts in the microwave. Keep an eye out for a smooth, shiny finish — no streaks or graininess.
Step 2: Crumb your cake finely — don’t leave big chunks — then mix in a bit of frosting until it feels like a moldable dough. Chill this mixture for about 30 minutes.
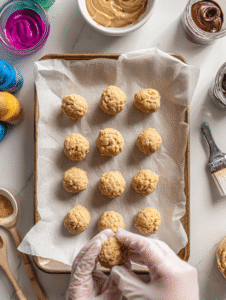
Step 3: Roll the cake mixture into small balls, about the size of a walnut. Place them on a parchment-lined tray and freeze for at least 15 minutes.
Step 4: Melt more chocolate, and dip the tip of a lollipop stick into the chocolate before inserting it into each cake ball. This helps hold everything together.
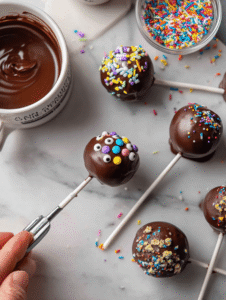
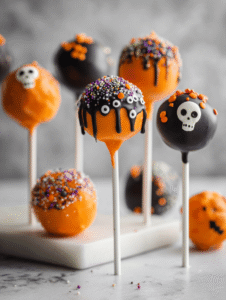
Step 5: Dip each cake pop into the melted chocolate, swirl off excess, and decorate with spooky sprinkles or edible eyes. Stand upright in a styrofoam block to set.
Step 6: Once set, you can add finishing touches like face paint with icing or edible markers for extra creepiness.
Creepy Crafting: Key Checkpoints & Tips
- Chocolate should be glossy and smooth—if it’s lumpy or dull, re-melt and stir in a bit of vegetable oil.
- Cake mixture should be firm enough to hold shape—if it’s too soft, pop it back in the fridge.
- Cake pops should be fully coated and set before handling—if they’re sticky, give them more time to dry.
- Use room temperature chocolate for a smoother dip—cold chocolate can seize up and cause cracking.
Oops! Common Mistakes & How to Fix Them
- Chocolate is too thick to dip.? Melted chocolate seizes or gets lumpy → Stir in a teaspoon of vegetable oil to smooth out.
- Cake balls fall apart when dipping.? Cake mixture is too soft and sticky → Chill it longer or add a bit more cake crumbs.
- Chocolate shell is not crispy enough.? Chocolate cracks or flakes off → Ensure proper tempering or use room temperature chocolate.
- Decorative elements smear or melt.? Decorations melt or bleed → Use dry candies and work quickly.
Halloween Cake Pops
Ingredients
Equipment
Method
- Start by melting your chocolate in a double boiler or microwave-safe bowl until smooth and shiny—this should take about 2-3 minutes in the microwave, stirring every 30 seconds to prevent burning.
- Crumb your leftover cake finely with your hands or a fork, breaking it down into small, even pieces that feel crumbly but hold together when pressed.
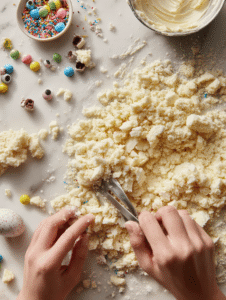
- Mix in the frosting gradually until the mixture becomes a soft, moldable dough that sticks together when pressed—this helps it hold shape when formed into balls.
- Shape the mixture into small balls about the size of a walnut, then place them on a parchment-lined tray and pop into the freezer for 15-20 minutes to firm up.
- Once chilled, melt a bit more chocolate if needed. Dip the tip of a lollipop stick into the melted chocolate and insert it carefully into each cake ball, about halfway through—this acts as a glue.
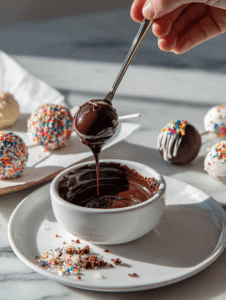
- Dip each cake pop into the melted chocolate, swirling gently to coat evenly. Tap off excess and immediately decorate with sprinkles or place edible eyes before the coating sets.
- Set the decorated cake pops upright in a styrofoam block or cake pop stand to dry and set fully, which takes about 30 minutes. You can add extra details with icing or edible markers once dry.
- Check that the chocolate coating is crisp and shiny, and that decorations are secure. If the coating is sticky, give the pops more time to dry.